

Adding a webhook URL
- Dashboard
- API
To add a webhook endpoint via the Lago app, follow these steps:
- Go to the Developers section via the sidebar;
- Open the Webhooks tab;
- Click Add an endpoint;
- Enter the webhook name and URL;
- Choose the webhook signature between HMAC and JWT;
- Define the events you want to listen to by selecting the relevant checkboxes; and
- Click Create endpoint to confirm.
You can add up to 10 webhook endpoints.
The webhook signature
When you create a webhook endpoint, you choose between two signature options. Lago usesJWT when you do not choose one.
- Dashboard
- API
JWTembeds the payload in the signature header, so the header can grow large and some servers reject it;HMACsends a short signature header, so header size is never an issue.
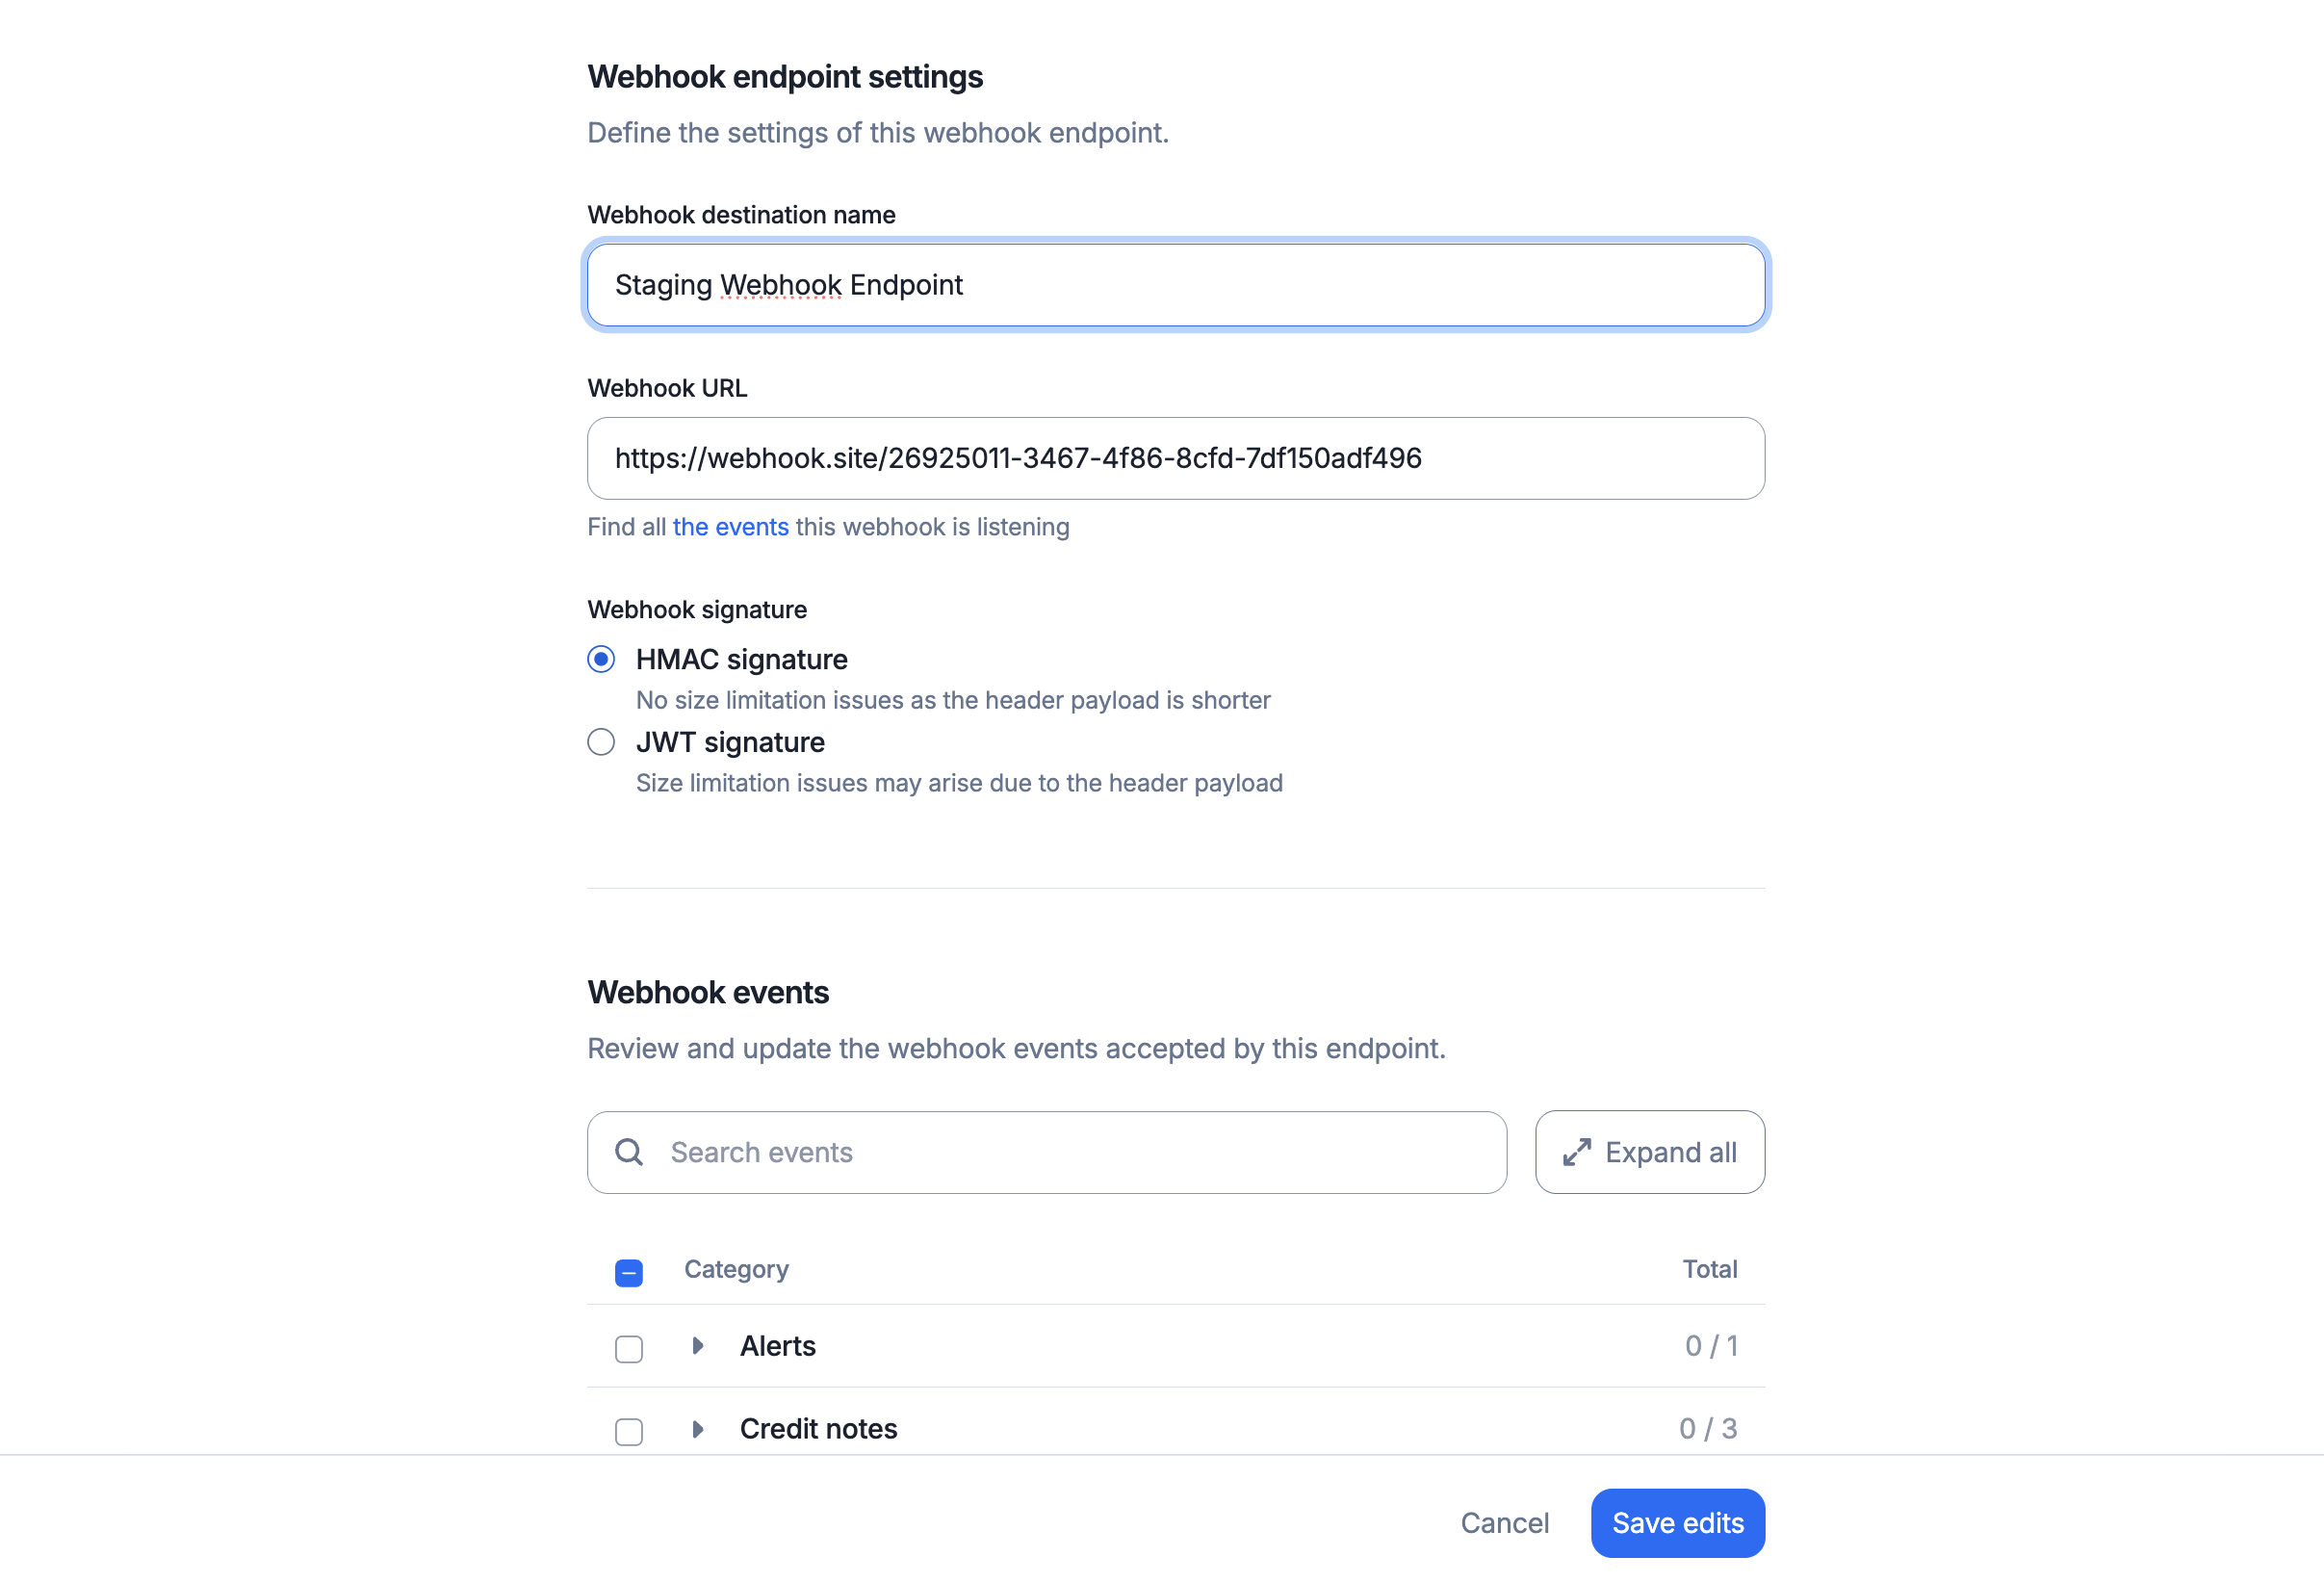
Webhook endpoint signature
Locate your HMAC signature token
To find your HMAC signature token, go to Developers > Webhooks and locate the HMAC signature token. Then reveal and copy the key.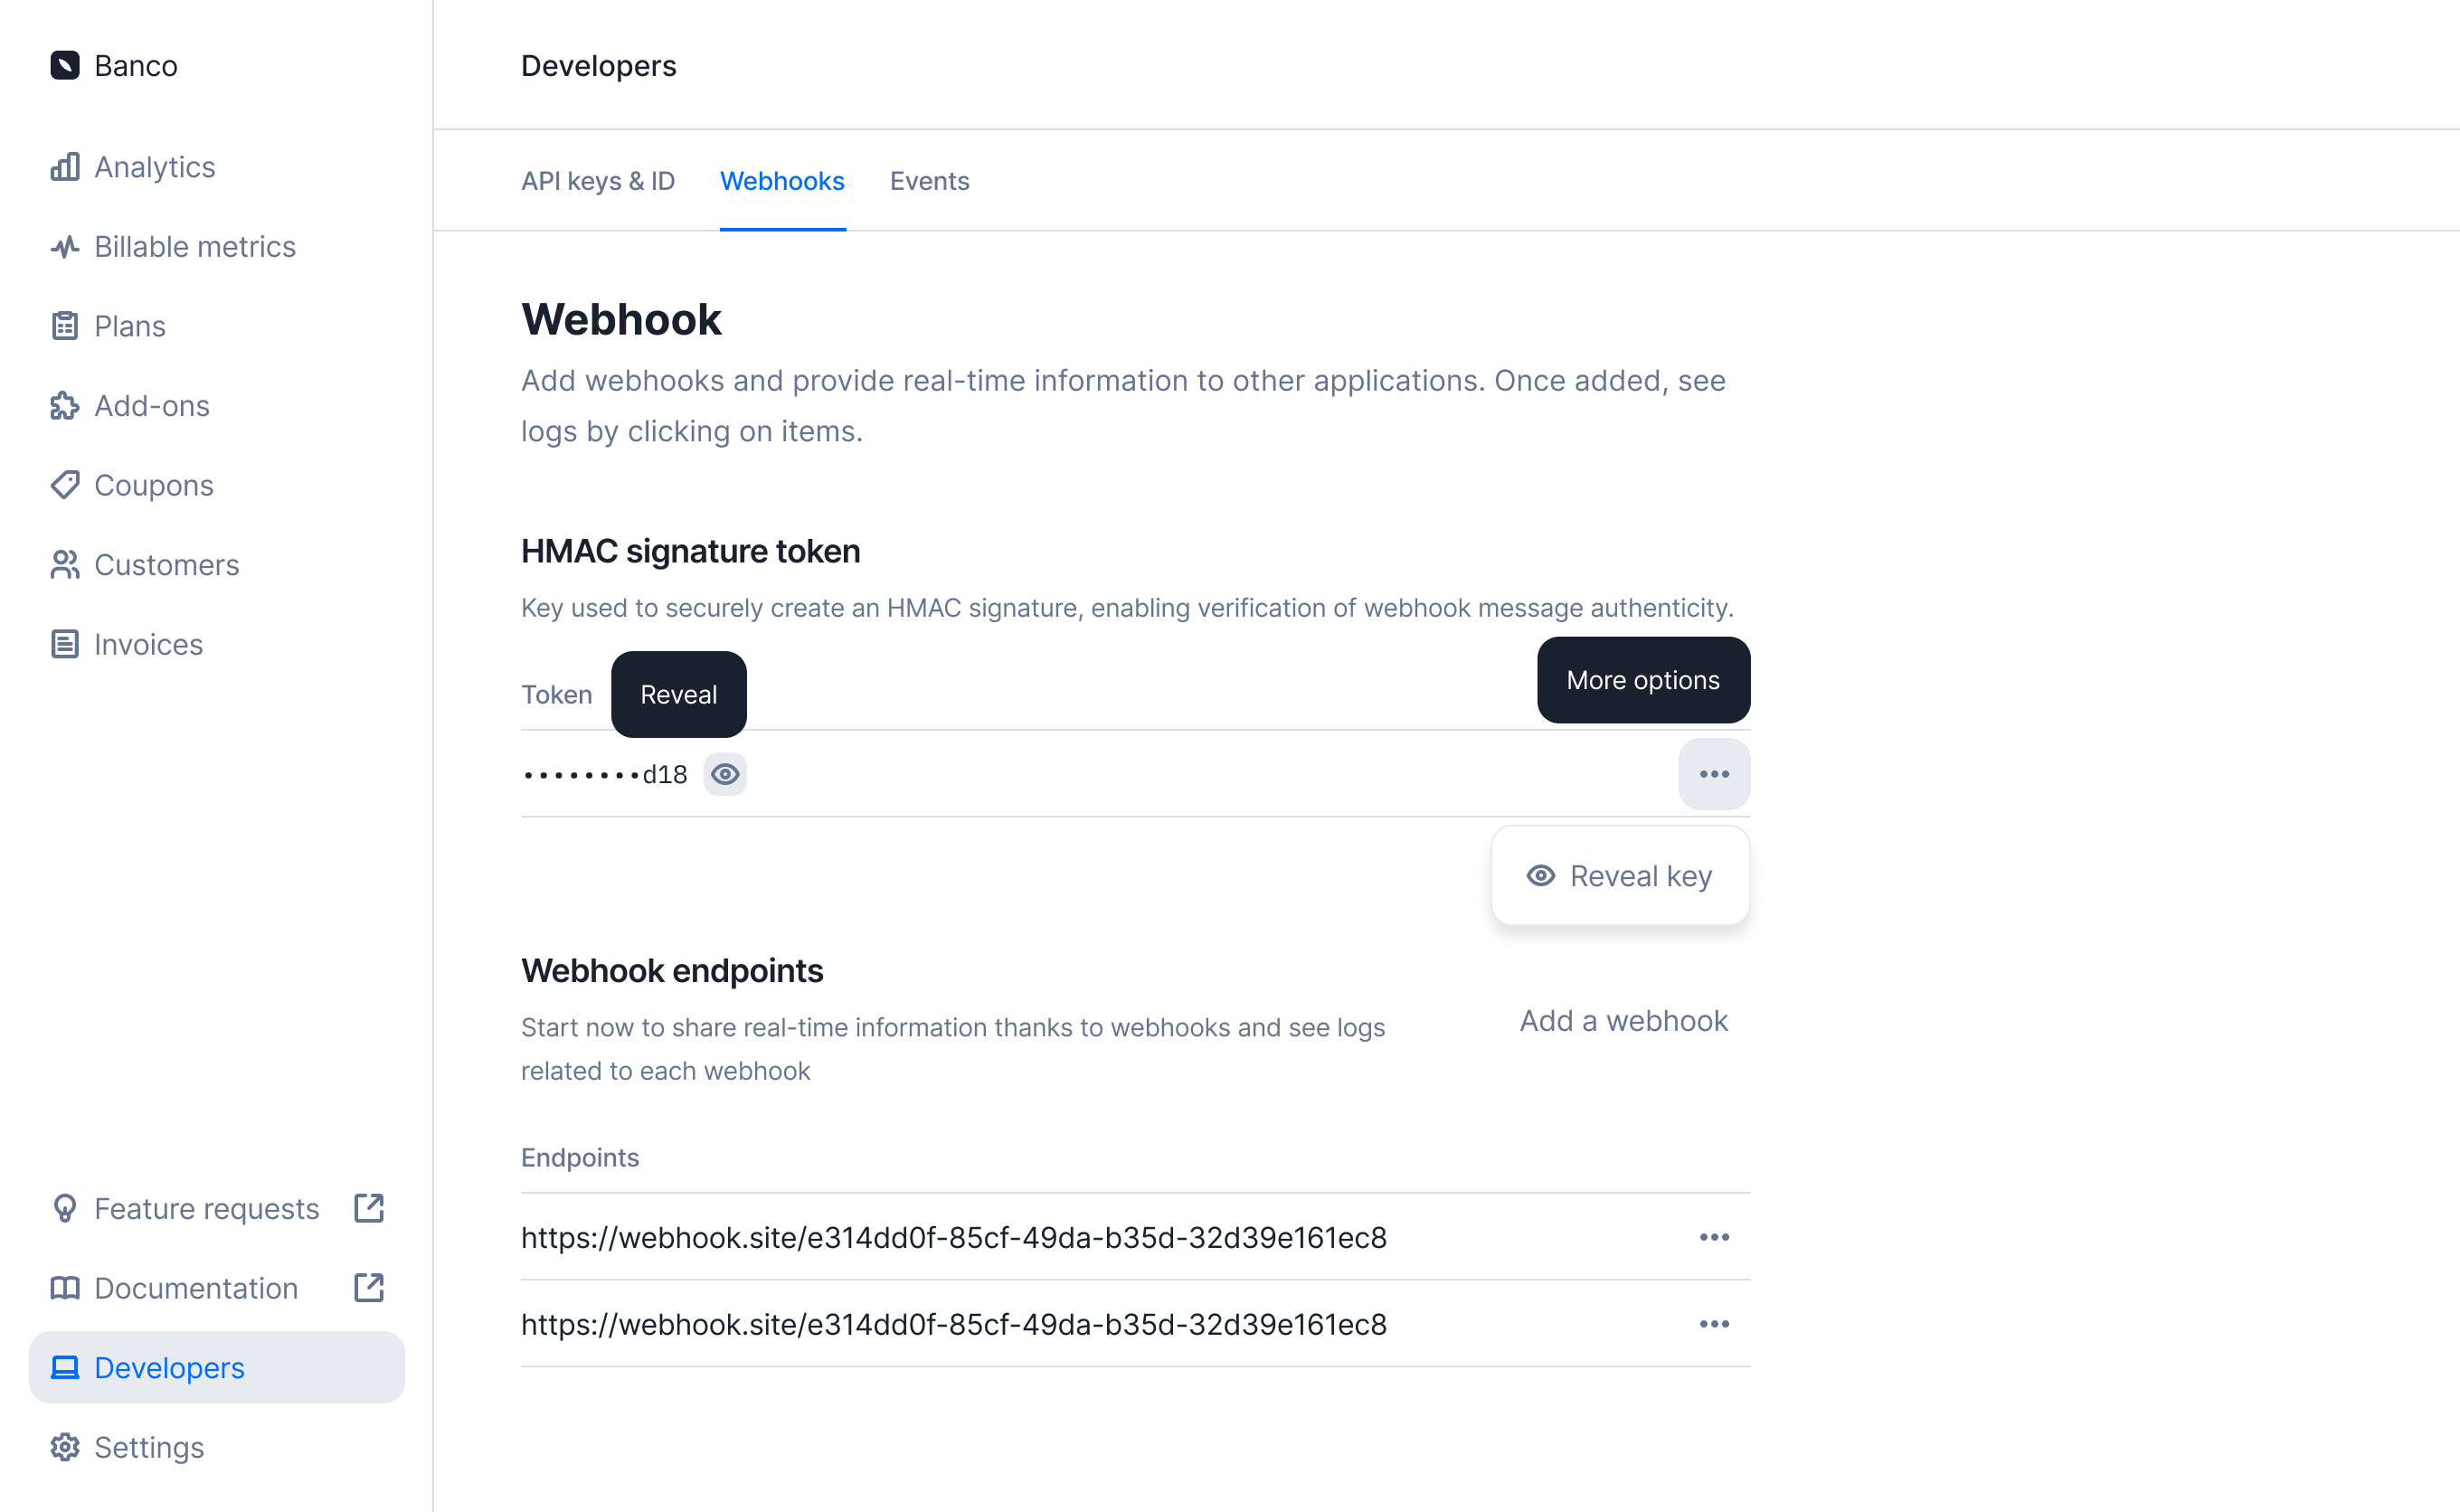
Locate your HMAC signature token
Accessing the webhook logs
Once a webhook is registered in the app, you can access the webhook logs:- Go to the Developers section via the sidebar;
- Open the Webhooks tab;
- Click the webhook endpoint, then open the Deliveries tab to see the list of events;
- Filter events by dates, types, HTTP status and status; and
- Click Refresh to load new events (optional).
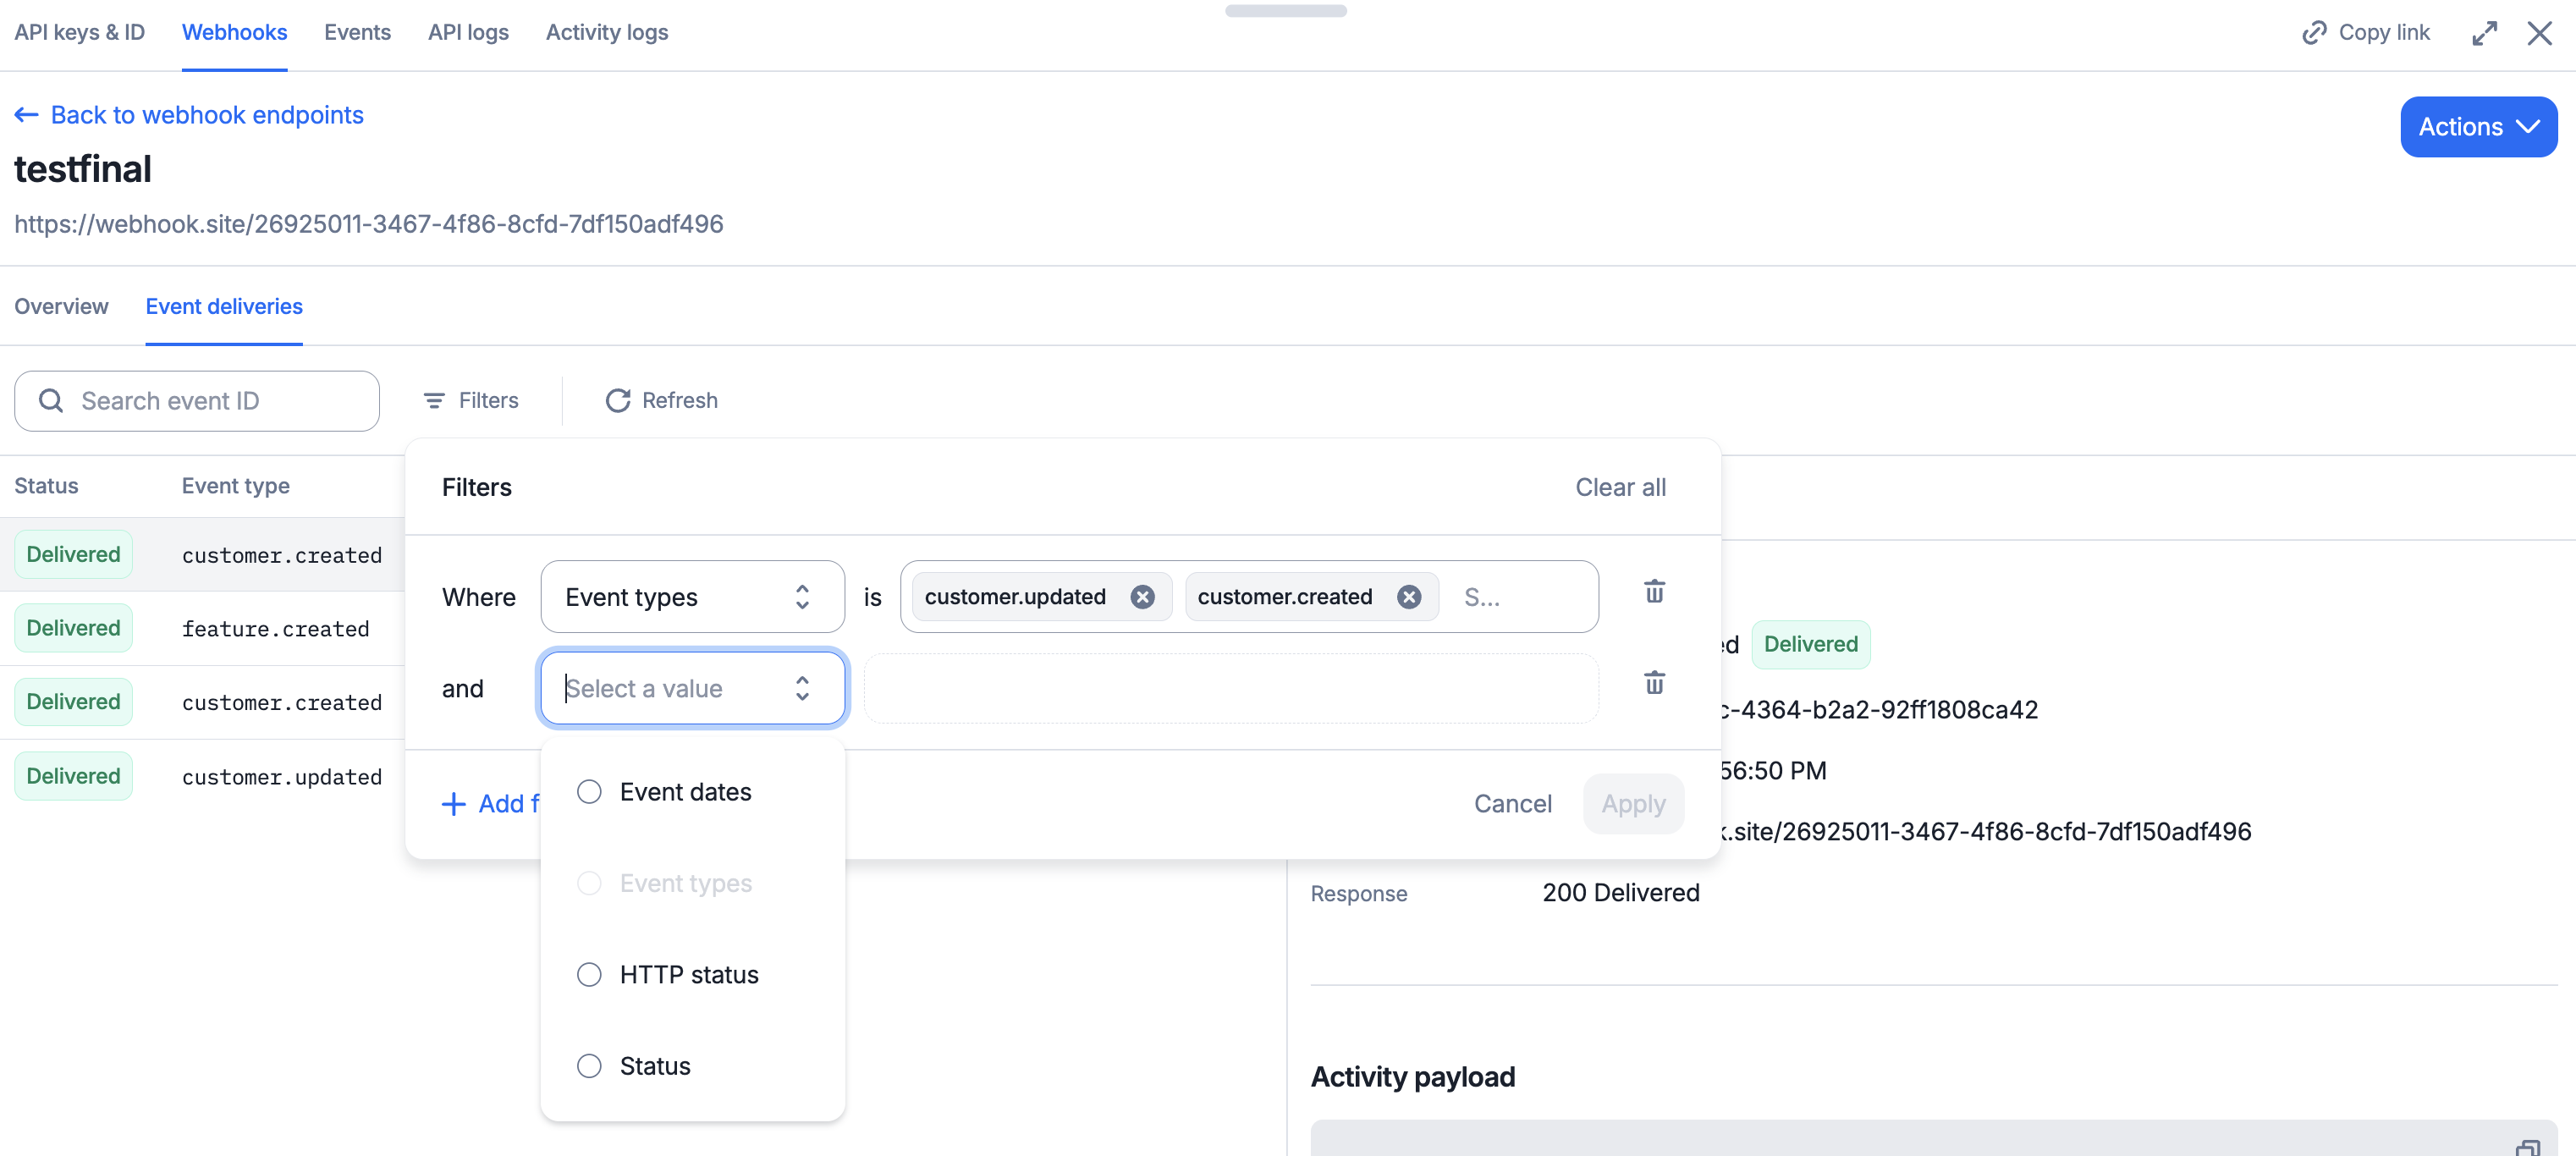
Webhook logs
Accessing a specific event
Click an event to see its details. Depending on the event status, Lago shows two or three main blocks:- A list of properties, including:
- Timestamp: the timestamp of the event;
- Webhook URL: the URL used to listen to events;
- Unique key: idempotency key associated with the event;
- Webhook type: the webhook type used to understand the action triggered;
- Response: the response code (i.e. acknowledgment of receipt);
- Number of retries: if the event failed, the number of retries attempted;
- A JSON snippet with the arguments sent by Lago; and
- The error response, when the event failed.
Errors and retries
Your webhook server should respond with a200, 201, 202, or 204 status code to acknowledge receipt of the event. Lago marks any other response as failed.
If your server does not acknowledge an event, Lago displays an error status in the webhook logs.
Lago makes up to 3 delivery attempts per event: the initial call plus 2 retries. On self-hosted instances, set the total number of attempts with LAGO_WEBHOOK_ATTEMPTS (default: 3) and the request timeout with LAGO_WEBHOOK_TIMEOUT_SECONDS (default: 30 seconds).