PREMIUM ADD-ON ✨This integration is available upon request only. Please contact us to get access to this premium integration.
Connecting Lago to Xero
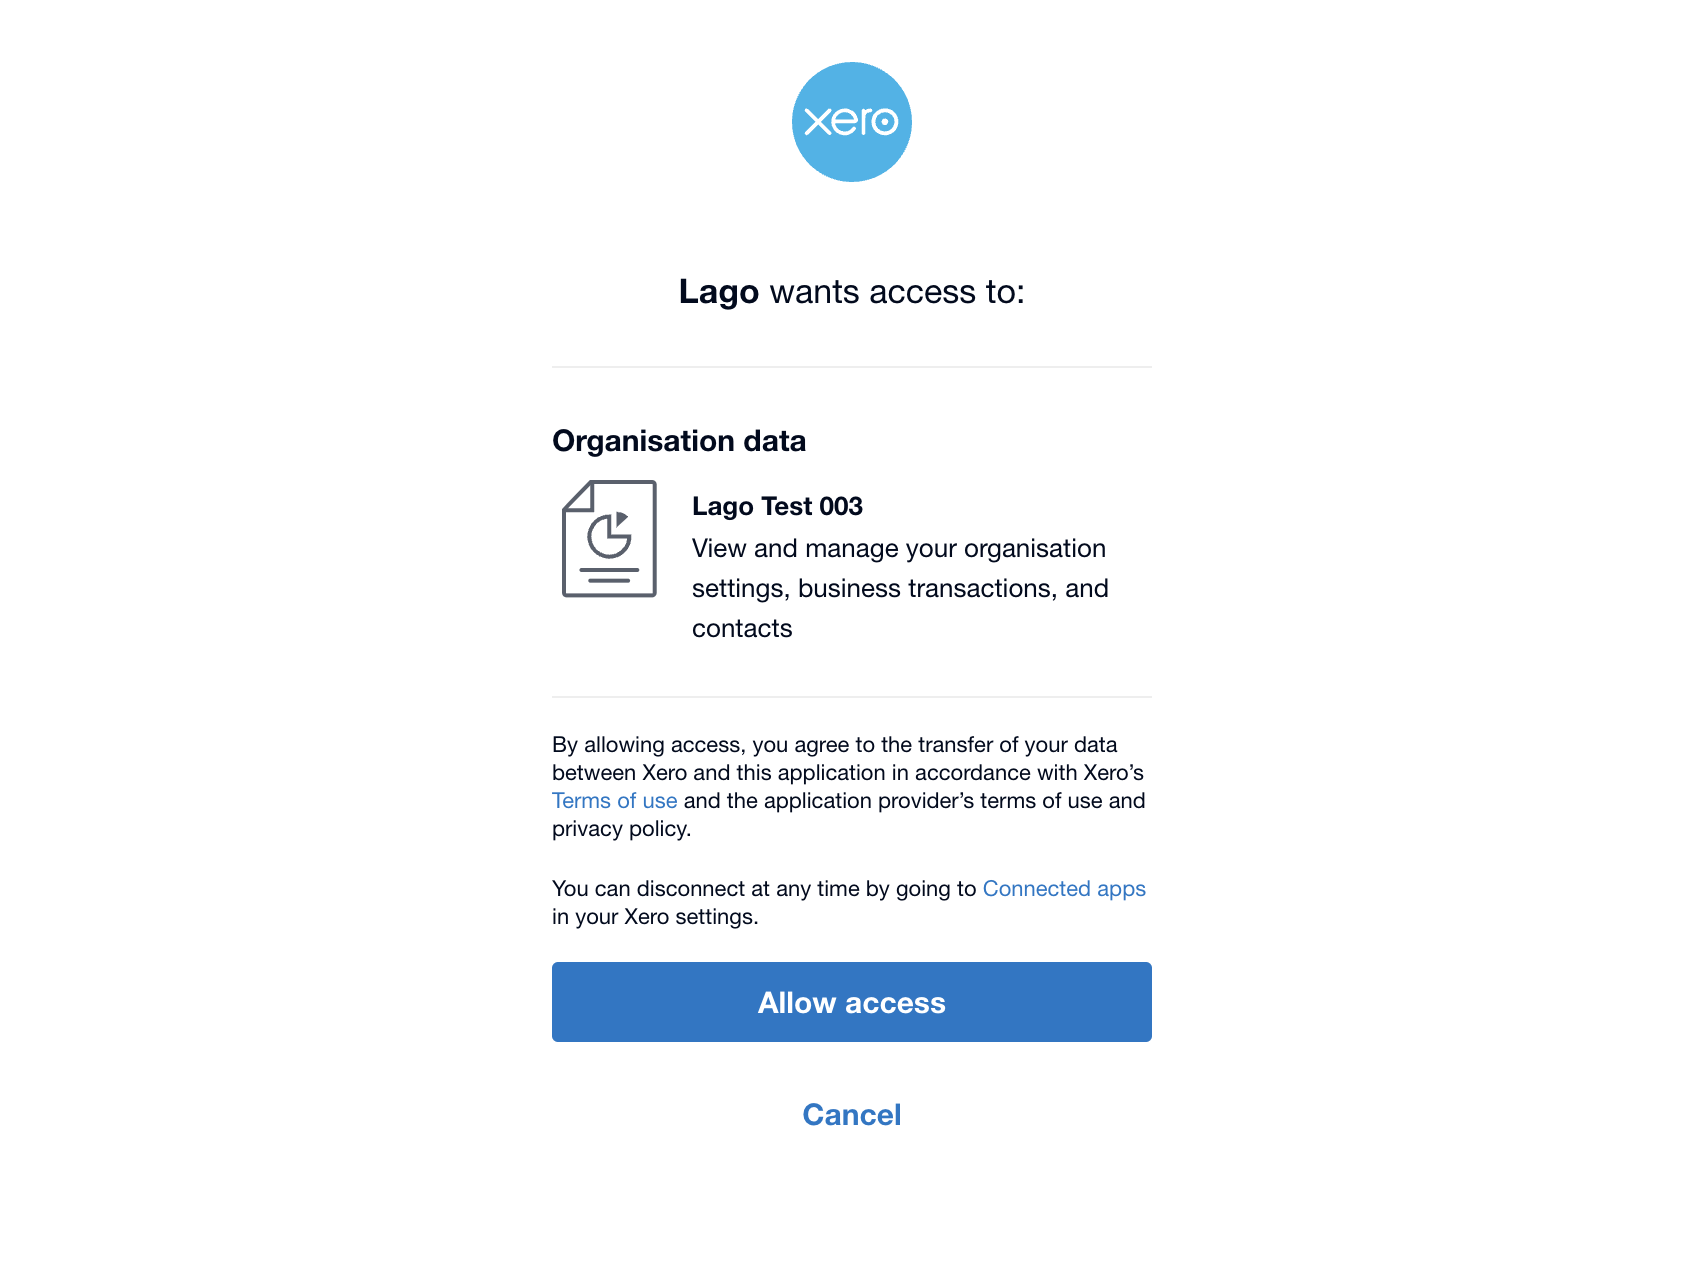
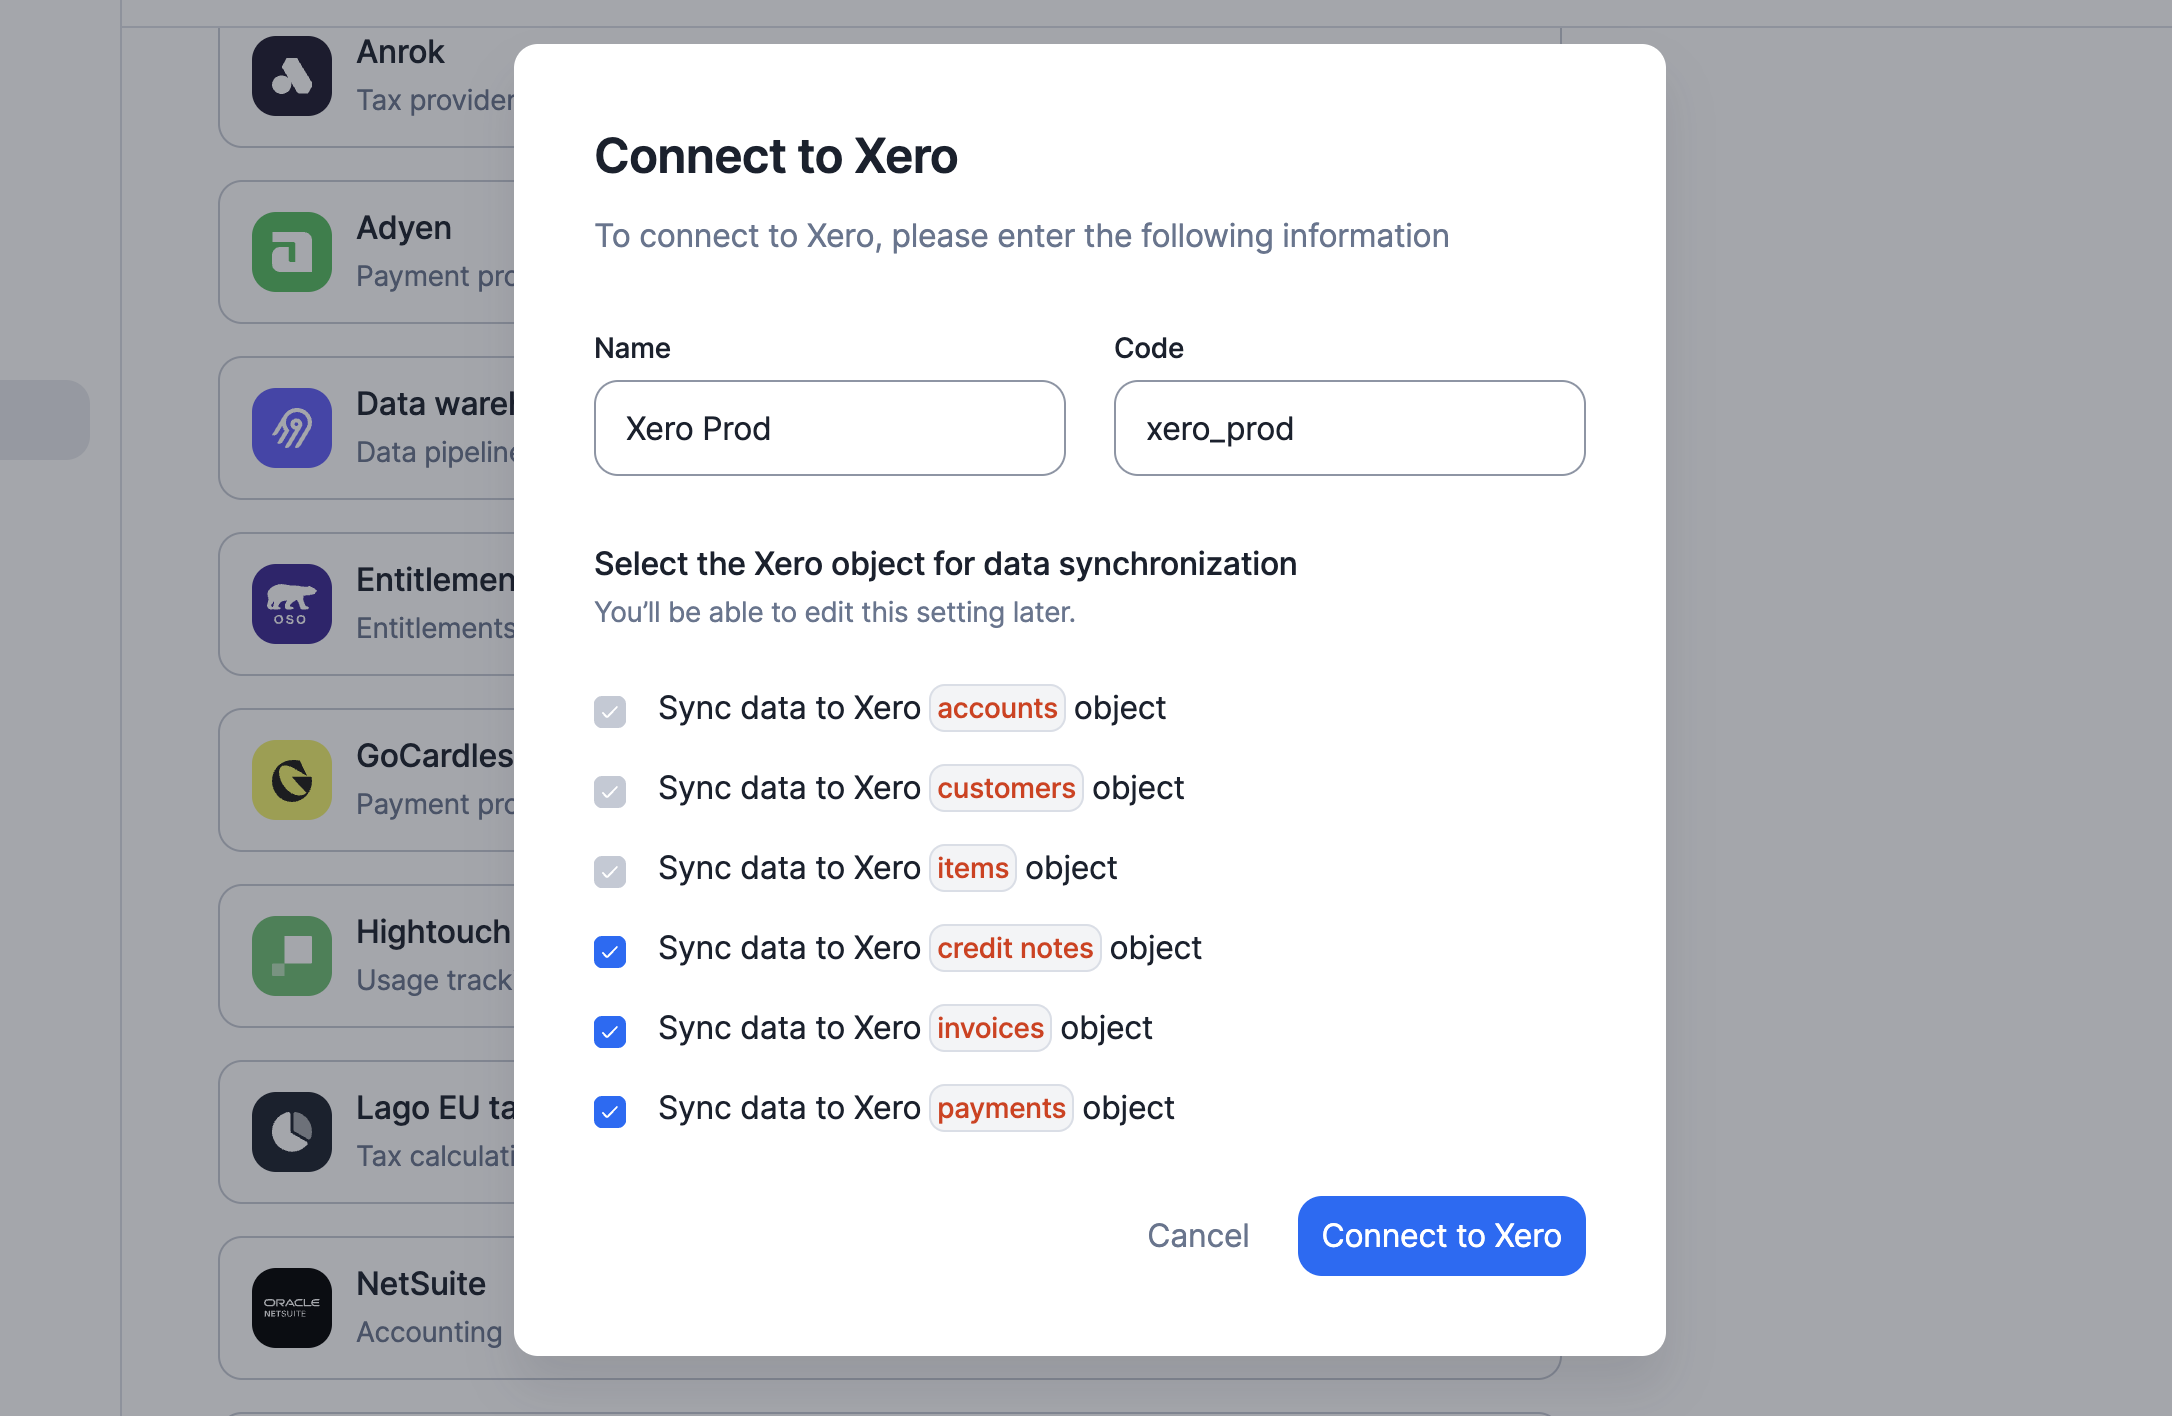
To fully integrate Lago with Xero, start by connecting your Lago instance to a new Xero connection. You can have an unlimited number of Xero connections. First, link your Xero account to Lago. Once connected, activate the specific syncs and actions required for your use case. This ensures that your Lago instance is properly configured to communicate with Xero, enabling seamless data synchronization and management.- In Lago, navigate to Integrations > Xero;
- Create a new Xero connection;
- Assign a unique name and code to the connection; and
- Use OAuth2 to grant access to your Xero instance.
Enable actions and syncs
Here is a list of syncs and actions that Lago uses with Xero. Some are mandatory, while others are optional:Accounts: Fetch account data from Xero (mandatory);Customers: Syncs or fetch customer data from Xero (mandatory);Items: Fetch item data from Xero (mandatory);Invoices: Syncs invoice data to Xero (mandatory);Credit Notes: Syncs credit note data to Xero (optional); andPayments: Syncs payment data to Xero (optional).
Mapping items between Lago and Xero
To sync invoices, credit notes and payments to Xero, Lago maps each Lago object to a corresponding Xero object (one-to-one). You can define mappings per Lago entity when different entities require distinct Xero items. If the same mapping applies across entities, configure a default mapping. It will be used for any entity that doesn’t have a specific override. Follow these steps to map an item:- Access a Xero Connection in Lago: navigate to your connected Xero integration within the Lago platform;
- Select the Item to map: click on the specific item in Lago that you wish to map to a corresponding Xero item;
- Fetch Items from Xero: Lago will automatically retrieve the relevant items from your Xero instance;
- Map the Item: choose the appropriate Xero item from the list provided by Lago; and
- Click ‘Save’ to finalize the mapping.
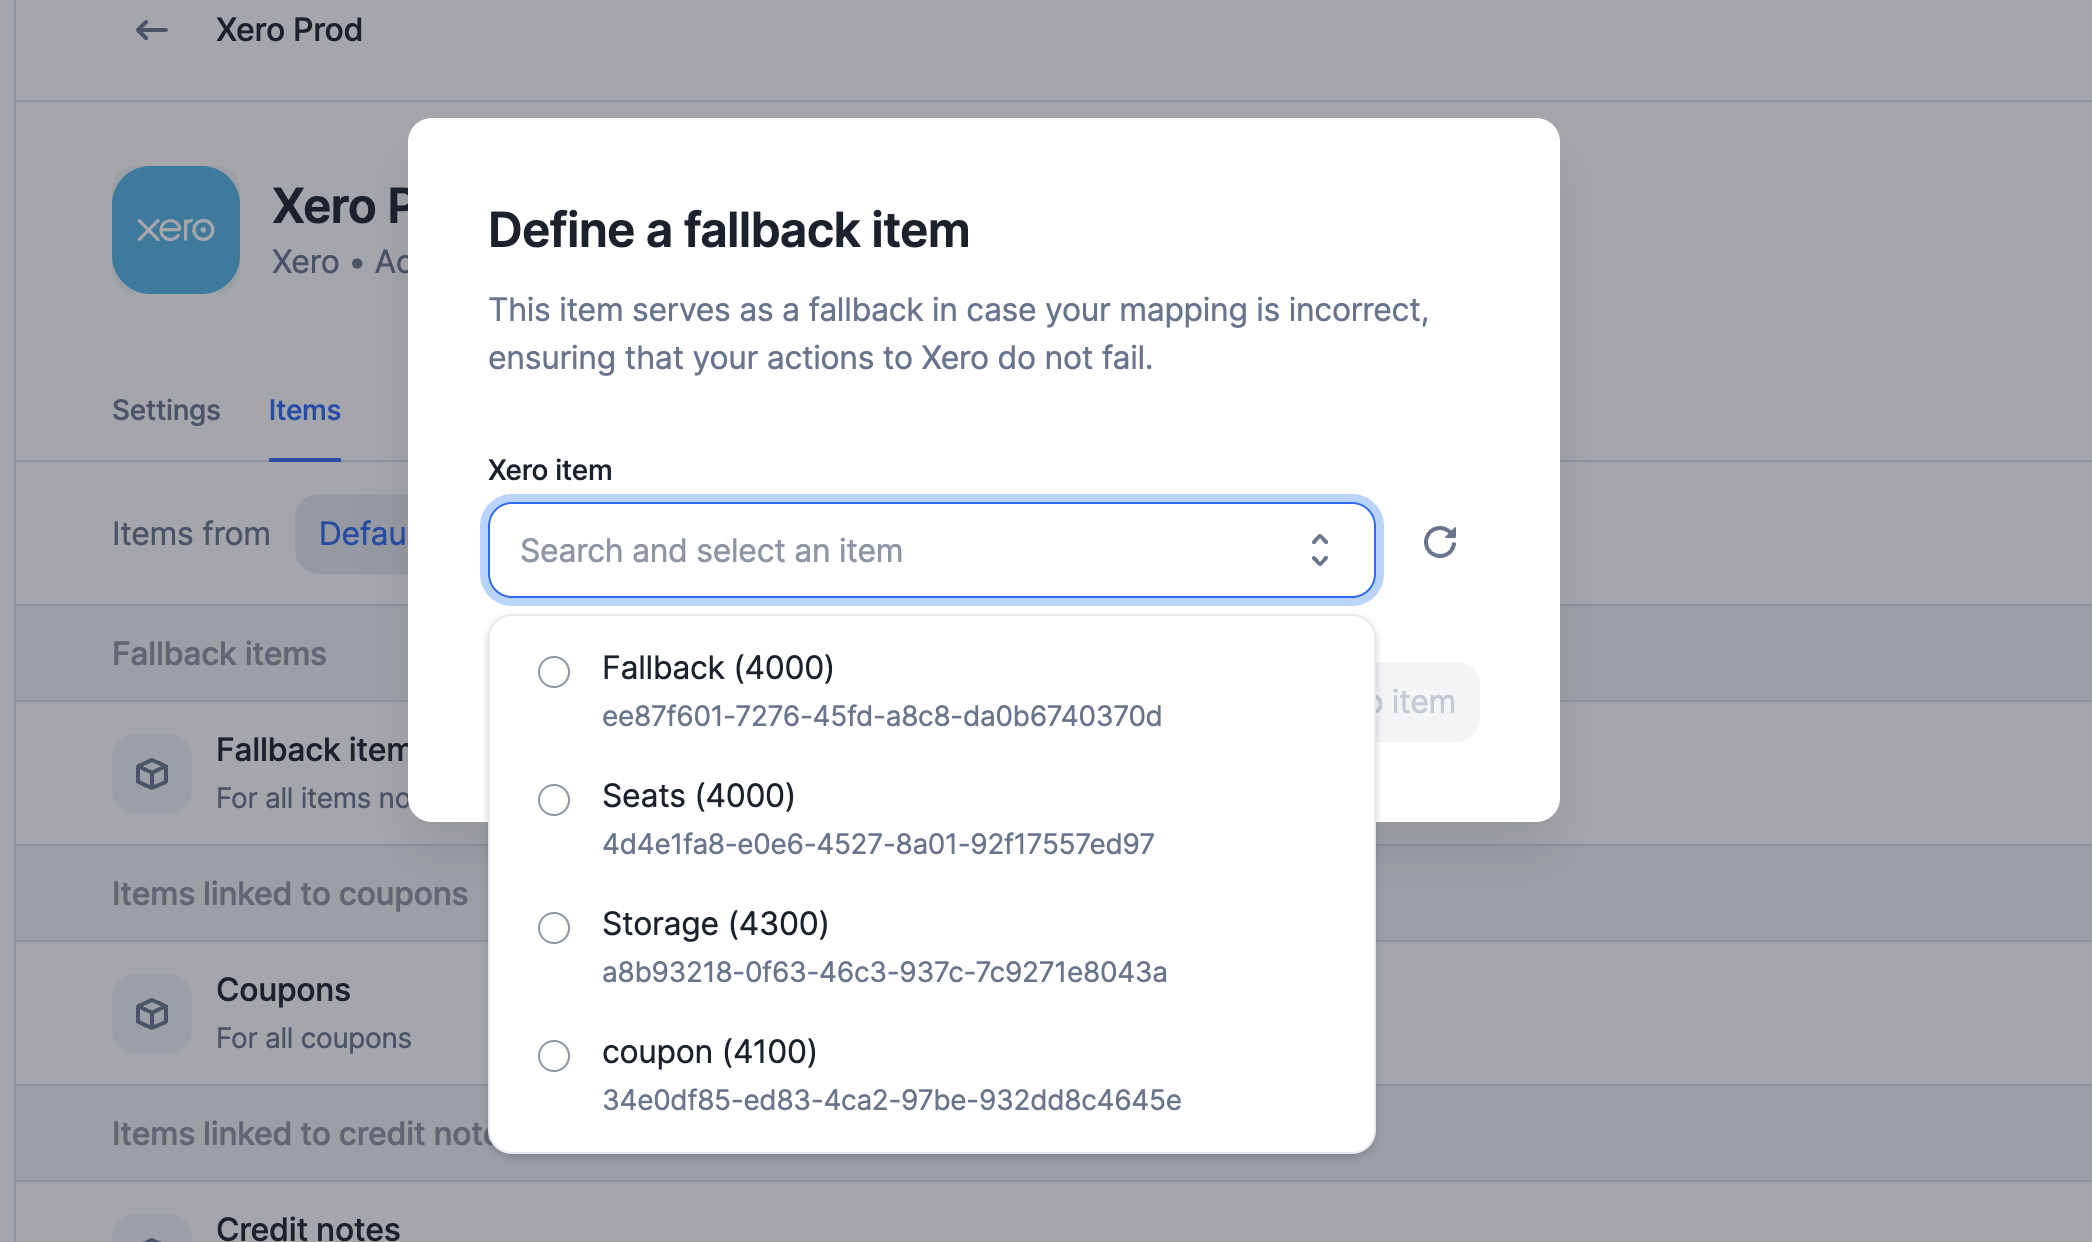
Mapping a fallback item (mandatory)
The fallback item is a dummy item used as a backup in case the mapping of other objects fails. To ensure continuous data synchronization between Lago and Xero, this fallback item will be used whenever there is a mapping issue.This mapping follows a one-to-many structure, meaning that a single fallback item can be used to handle multiple mapping issues.
Mapping a payment account (mandatory)
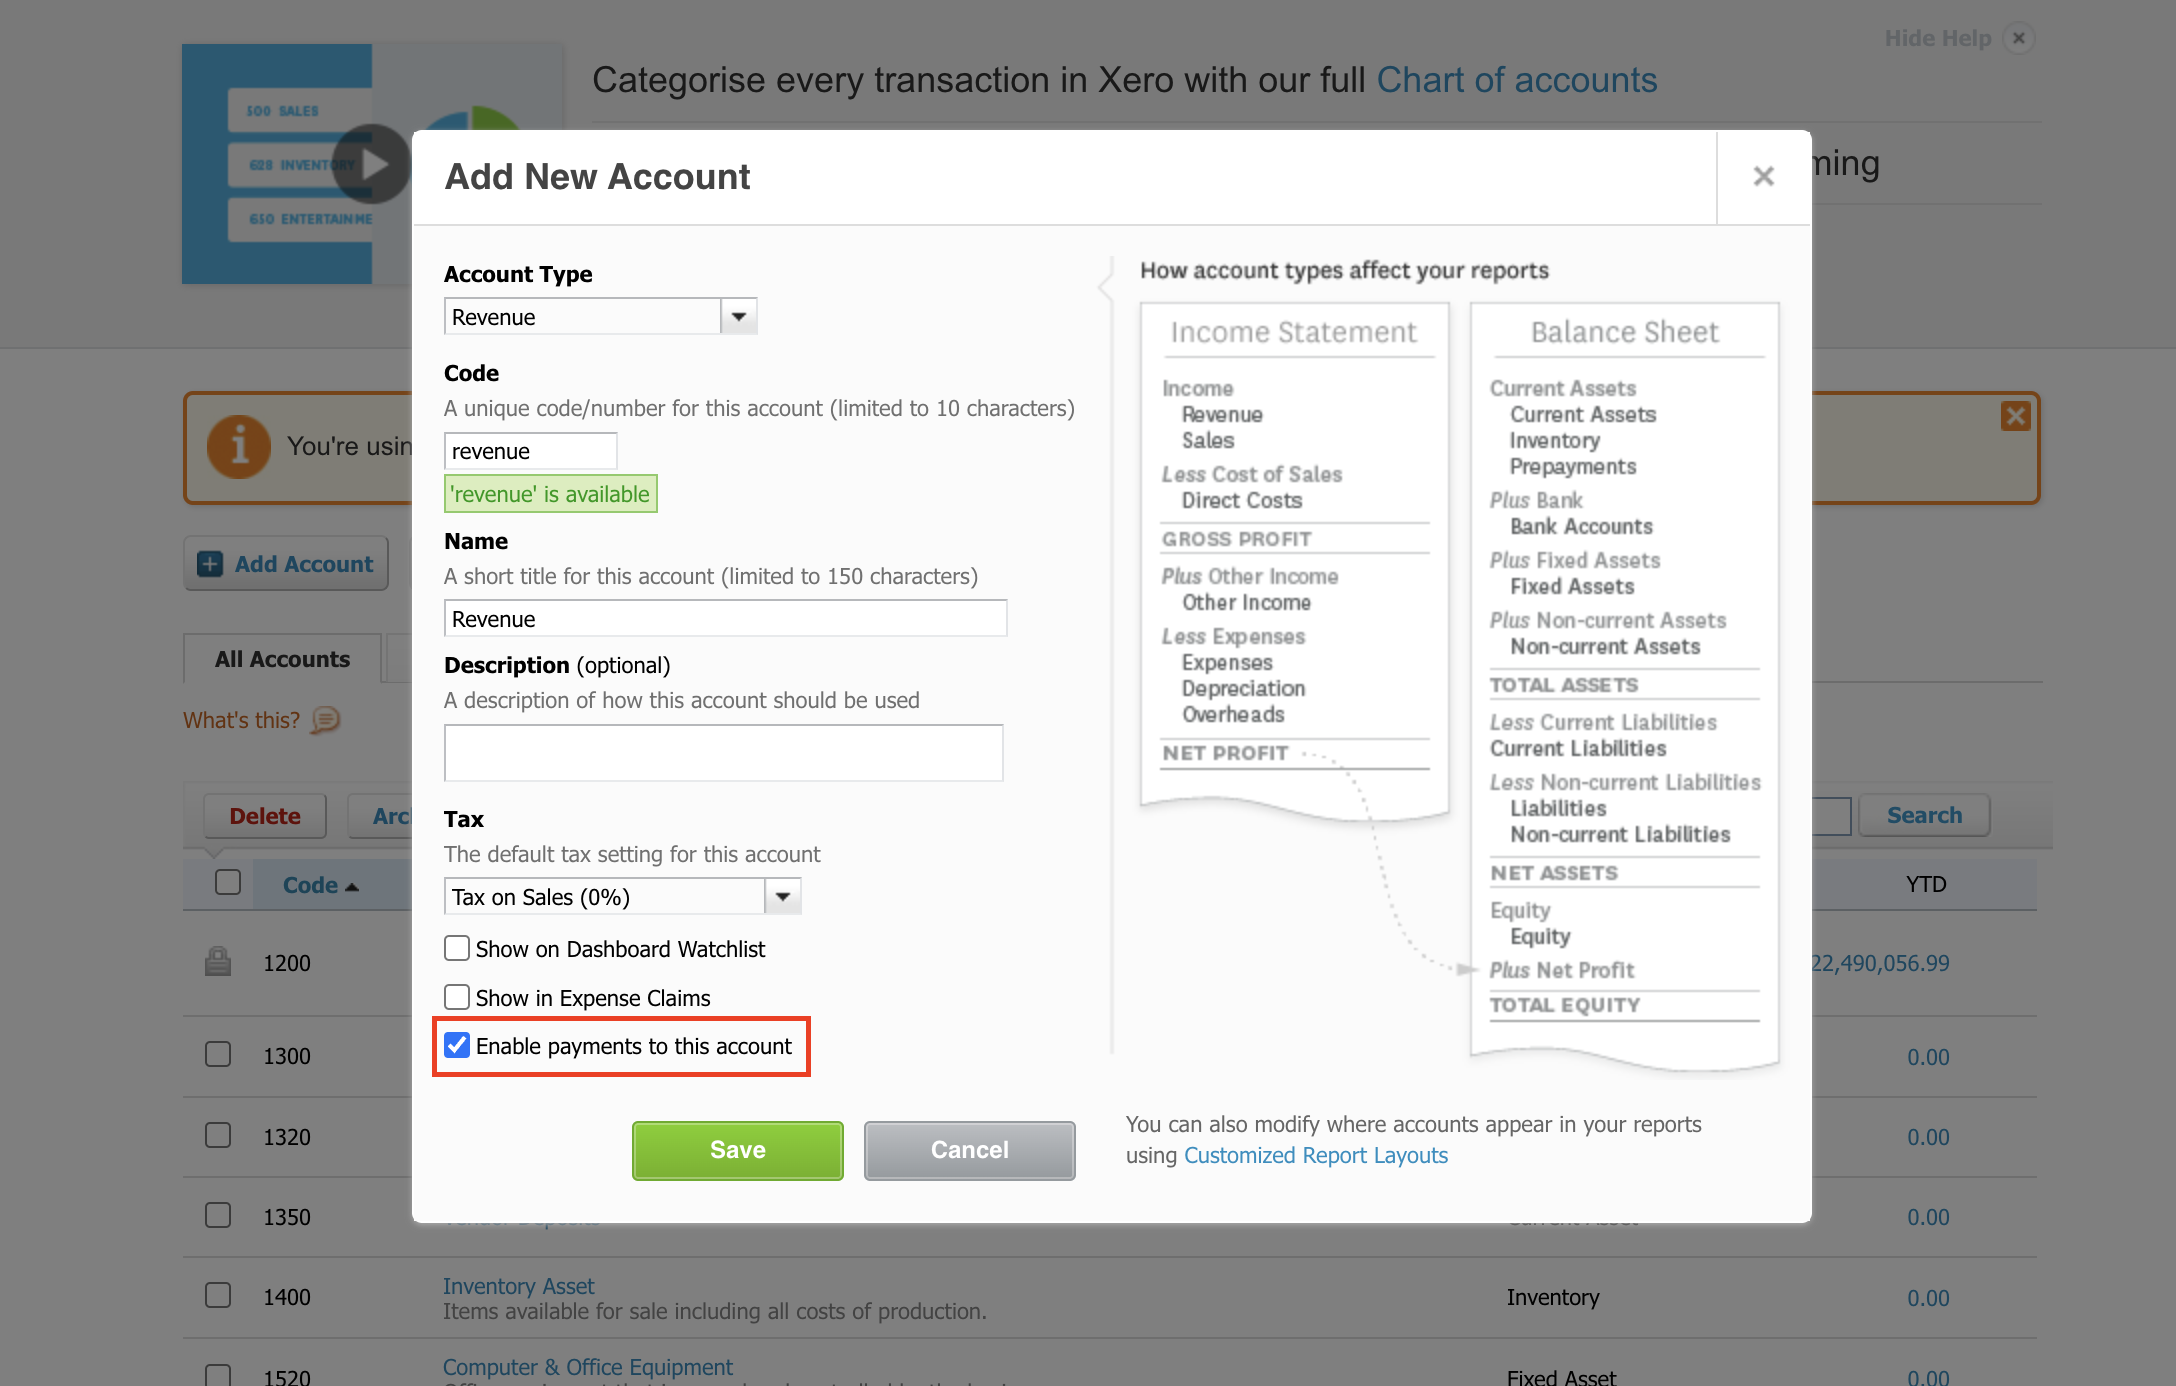
To synchronize invoice payments between Lago and Xero, ensure that at least one payment account is mapped. To set up a payment account in Xero, follow these steps:- Log in to your Xero instance;
- Navigate to Accounting > Chart of Accounts;
- Select an existing revenue account or create a new one; and
- When editing or creating the account, ensure the ‘Enable payments to this account’ checkbox is selected.
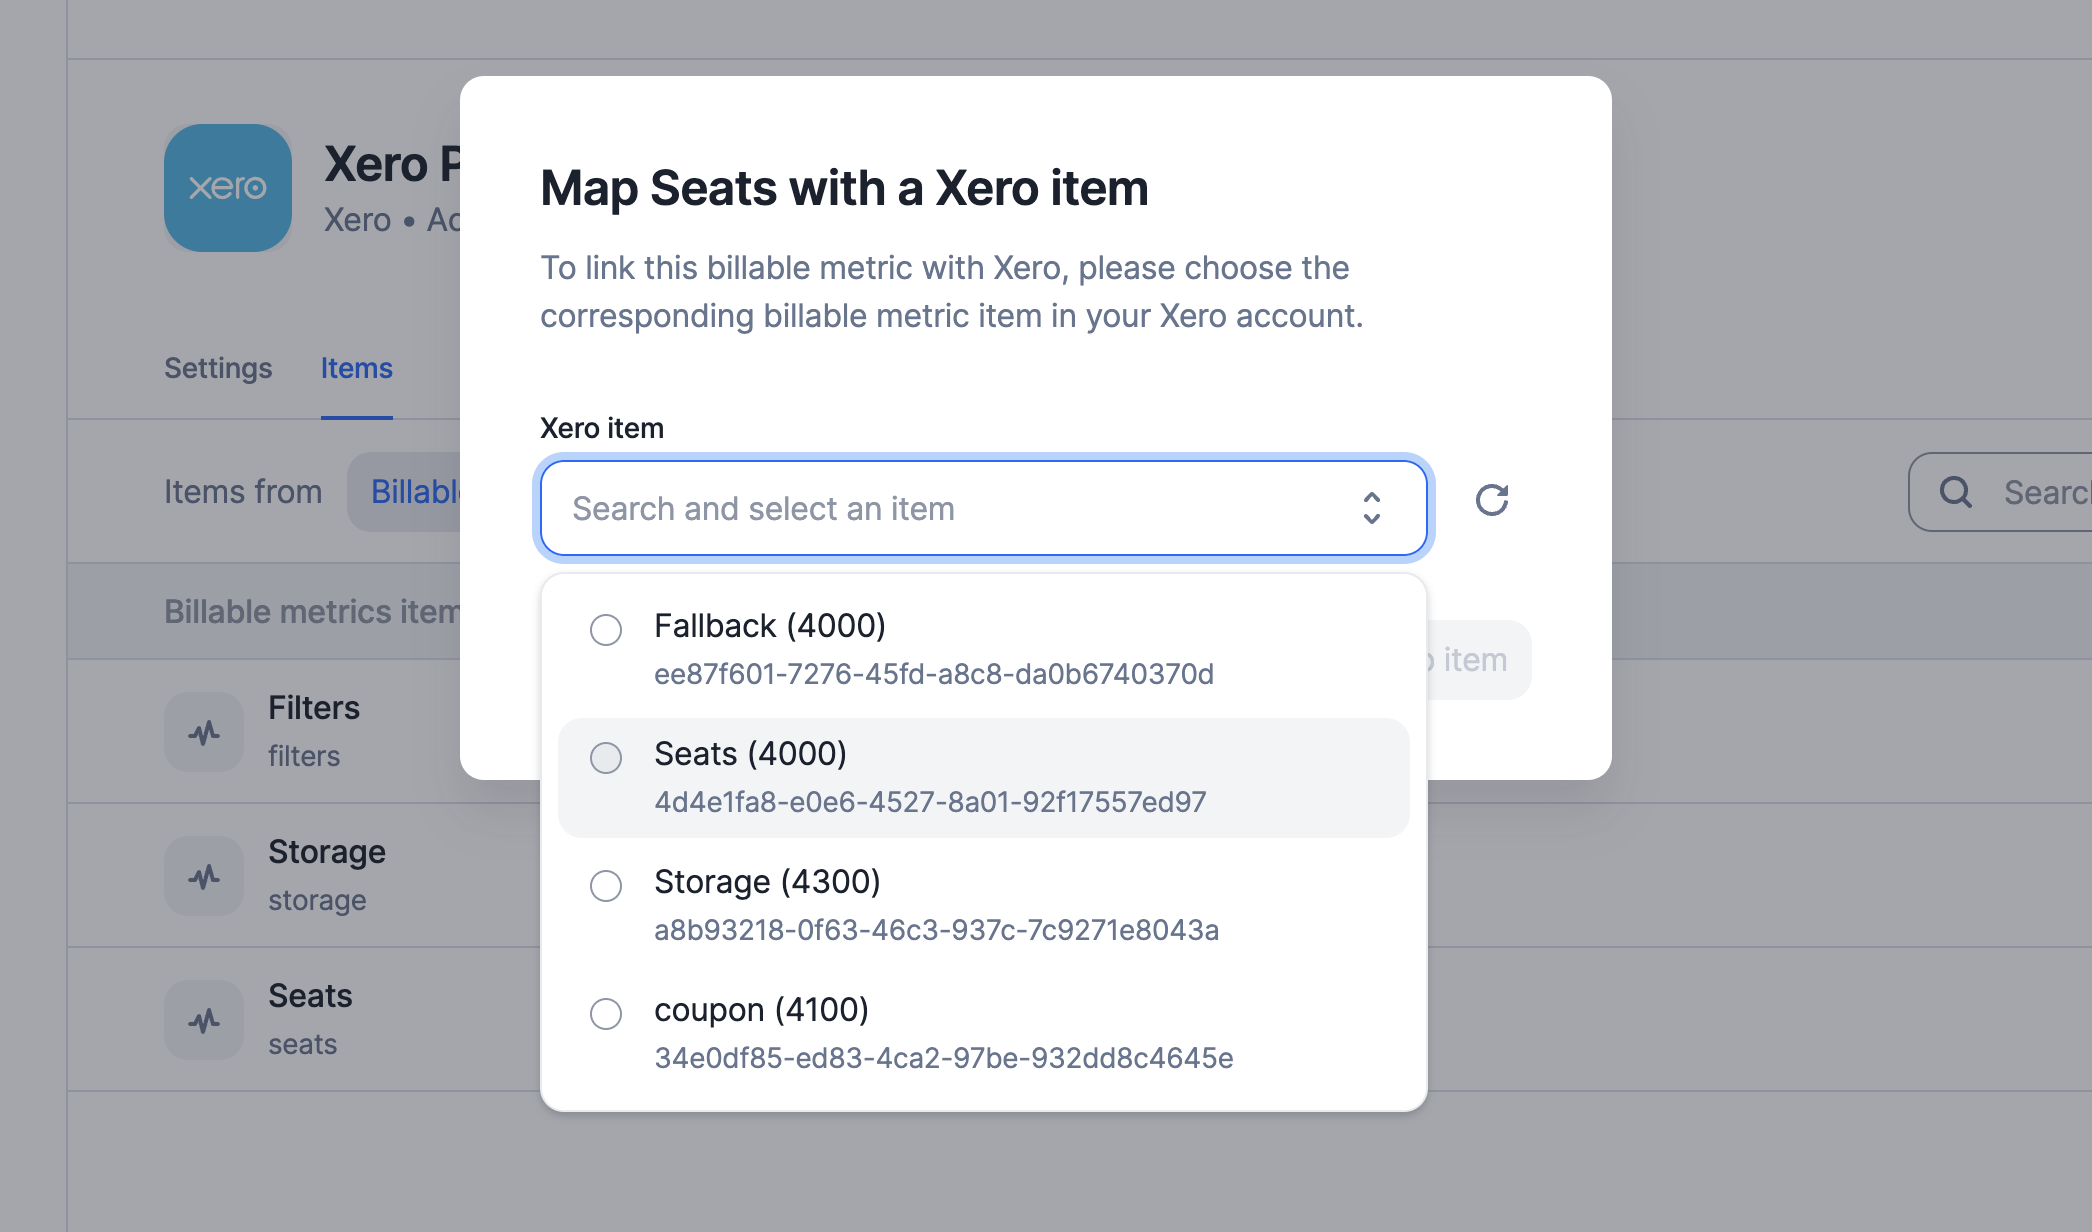
Mapping custom objects
Billable metrics and add-ons require a one-to-one mapping. Each billable metric, used for usage-based billing, must represent a specific SKU in your Xero instance. You need to map each of these individually. Lago will use the mapped items whenever any of these metrics or add-ons appear on the final invoice sent to Xero.This mapping follows a one-to-one structure, meaning each billable metric or add-on must be mapped to a specific Xero item.
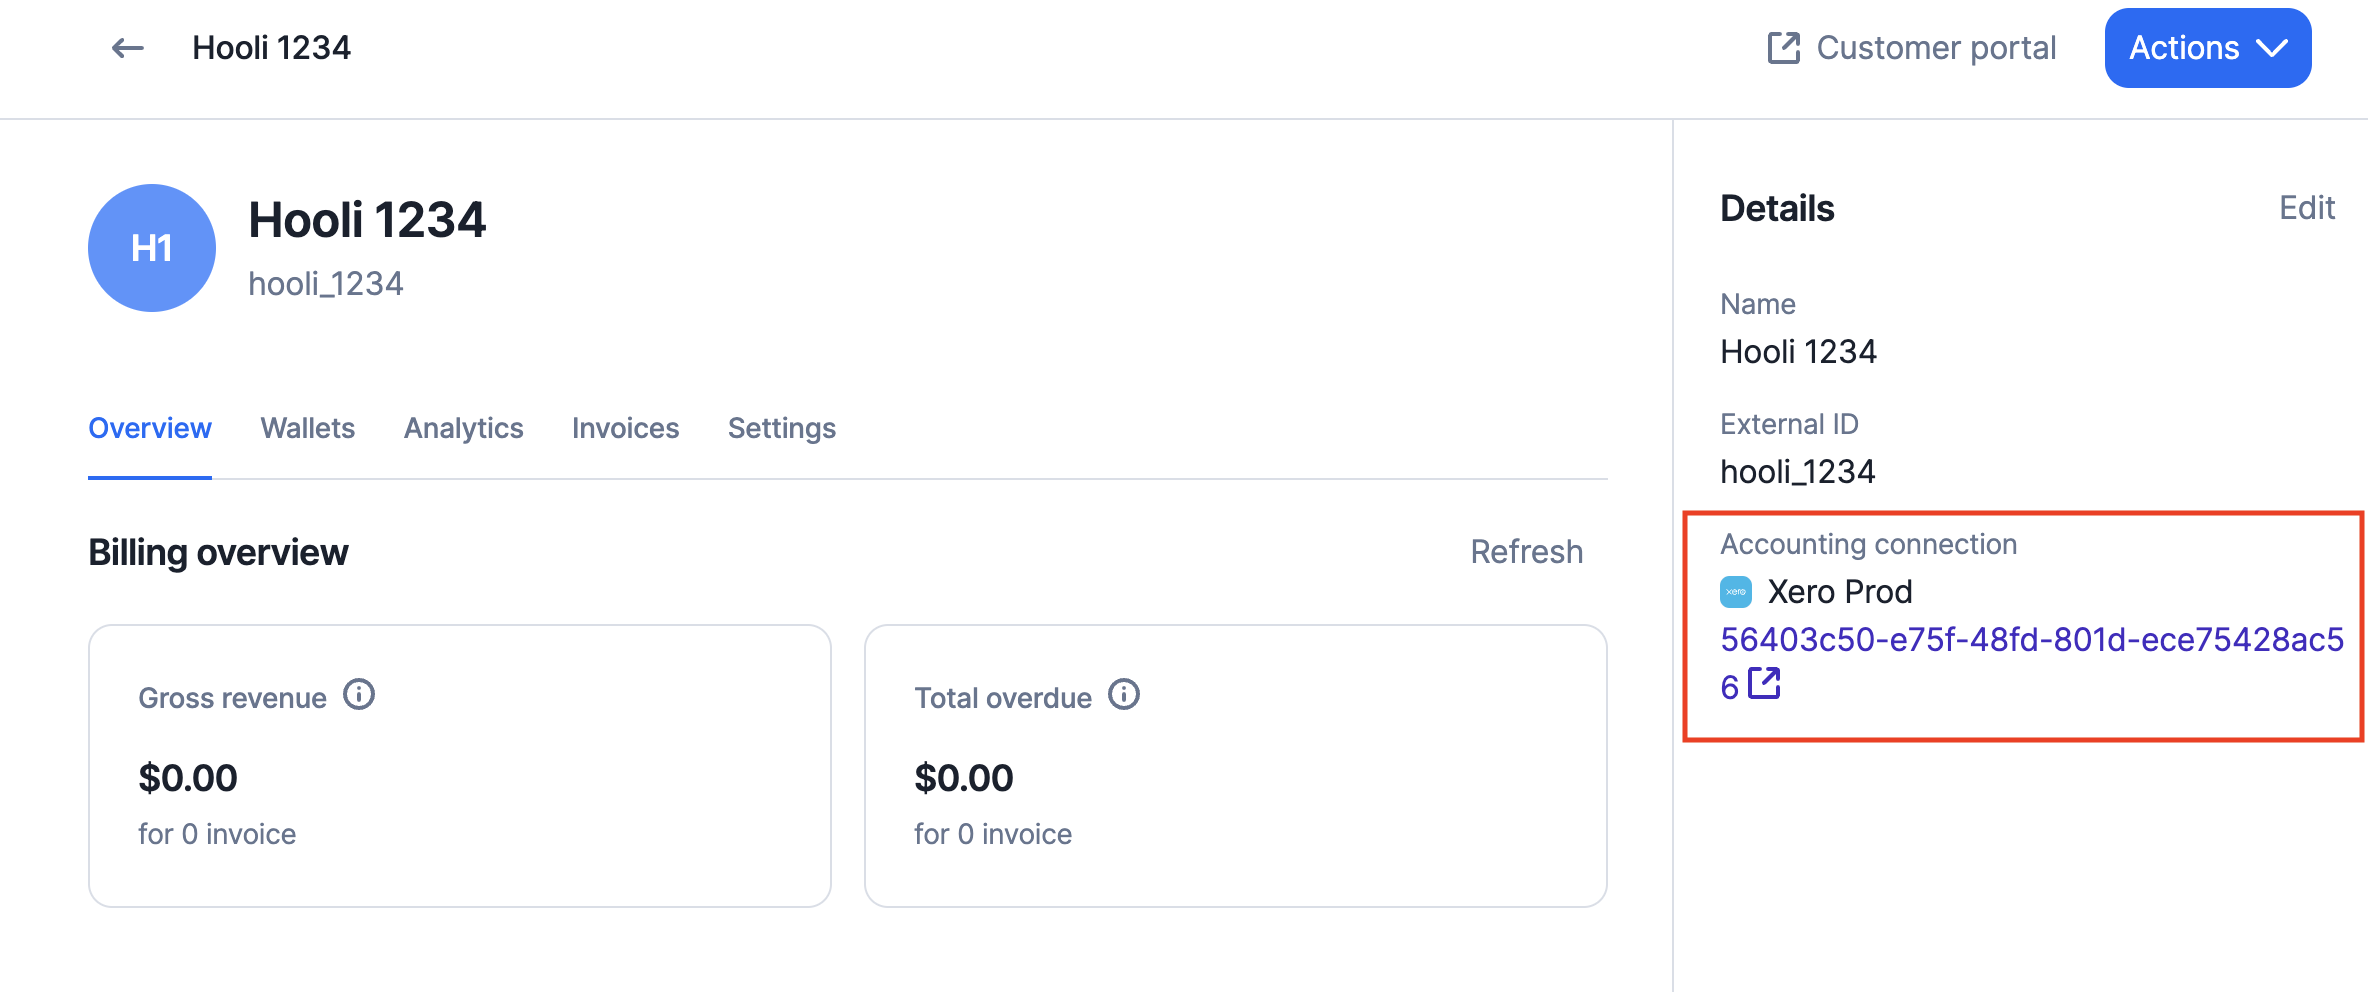
Customers synchronization
When creating or updating a Lago customer, you can choose to link it to a Xero customer. The first option is to automatically create a new customer from Lago to Xero. Follow these steps:- Create or update a new Lago customer;
- Select the targeted Xero connection;
- Check the box labeled ‘Create this customer automatically in Xero’; and
- Save and create this new customer.
Customer creation from Lago to Xero happens in real-time with only a few seconds of delay.
- Create or update a Lago customer;
- Select the targeted Xero connection;
- Ensure the box labeled ‘Create this customer automatically in Xero’ is unchecked;
- Paste the Xero customer ID in the appropriate field; and
- Save and create this new customer.
| Lago | Xero |
|---|---|
| customer | type |
| customer.name | Name |
| customer.email | EmailAddress |
| customer.phone | Phones |
| customer.tax_identification_number | TaxNumber |
| customer.address_line_1 | AddressLine1 |
| customer.address_line_2 | AddressLine2 |
| customer.city | City |
| customer.zip | PostalCode |
| customer.country | Country |
| customer.state | Region |
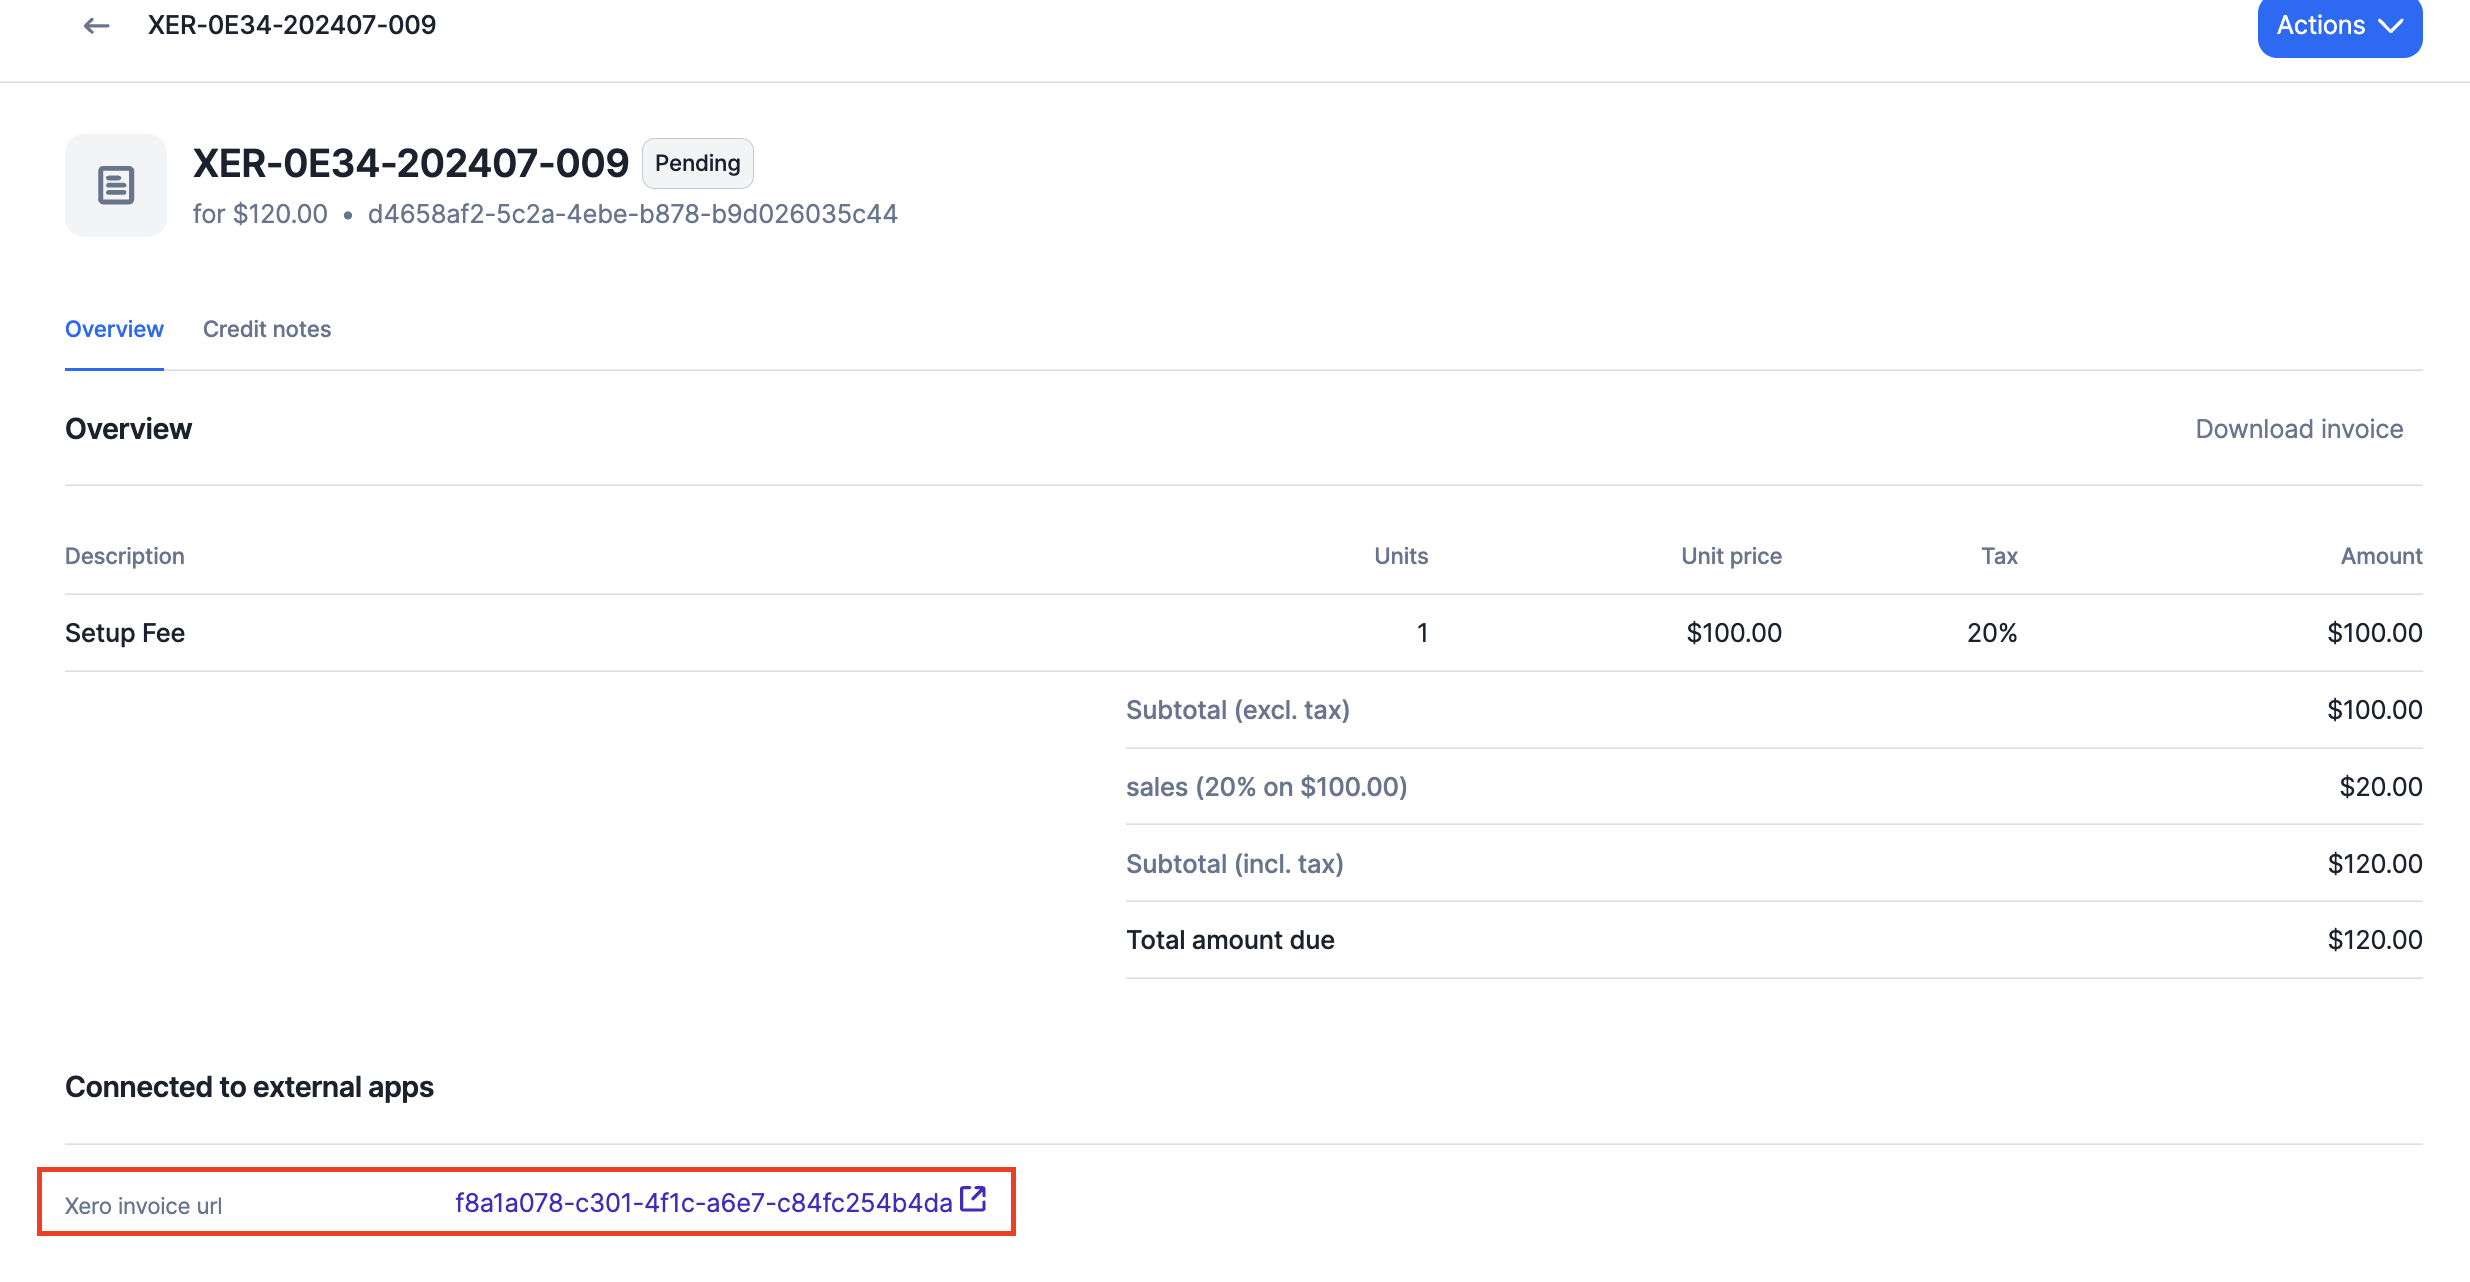
Invoices synchronization
If a Lago customer is linked to a Xero customer, Lago syncs invoices to Xero Invoices in real-time. It’s important to note the following:- Each fee issued by Lago is synced as a line item on a Xero invoice;
- The Lago fee
unitsare synced to Xero asQuantity; - The Lago fee
precise_unit_amountis synced to Xero asUnitAmount; - Lago can send the total tax amount for a specific line item; and
- Lago can apply discount to a specific line item.
Invoice creation from Lago to Xero happens in real-time with only a few seconds of delay.
| Lago | Xero |
|---|---|
| invoice | type |
| invoice.number | InvoiceNumber |
| invoice.status | Status |
| invoice.currency | CurrencyCode |
| invoice.issuing_date | Date |
| invoice.payment_due_date | DueDate |
| invoice.fee.units | Quantity |
| invoice.fee.precise_unit_amount | UnitAmount |
| invoice.fee.amount_cents | LineAmount |
| invoice.fee.taxes_amount_cents | TaxAmount |
| invoice.fee.precise_coupons_amount_cents | DiscountAmount |
Credit Notes synchronization
If a Lago customer is linked to a Xero customer, Lago syncs credit notes to Xero Credit Notes in real-time. It’s important to note the following:- Each fee refunded by Lago is synced as a line item on a Xero Credit Note; and
- Any discounts on an credit note (like coupon, for instance) are synced as line items on the Xero Credit Note.
Credit note creation from Lago to Xero happens in real-time with only a few seconds of delay.
| Lago | Xero |
|---|---|
| credit_note.number | CreditNoteNumber |
| credit_note.reference | Reference |
| credit_note.status | Status |
| credit_note.currency | CurrencyCode |
| credit_note.issuing_date | Date |
| credit_note.line_item.units | Quantity |
| credit_note.line_item.precise_unit_amount | UnitAmount |
| credit_note.line_item.amount_cents | LineAmount |
| credit_note.line_item.taxes_amount_cents | TaxAmount |
Payments synchronization
If a Lago invoice is tied to a Xero invoice, Lago automatically syncs payments occurring in Lago to Xero, updating in-real time the payment status of the invoice in Xero.| Lago | Xero |
|---|---|
| invoice.id | Invoice |
| invoice.amount_cents | Amount |
Integration logs
Whenever an issue occurs in Xero, Lago will notify you through a webhook message calledcustomer.accounting_provider_error.