Integration setup
Connect your GoCardless account
To connect to GoCardless through the user interface:
- In the side menu, select “Settings”;
- Open the “Integrations” tab;
- Click “GoCardless” to create a connection;
- Give a name to this connection;
- Assign a code for easy identification;
- Click on “Connect to GoCardless” to be redirected to the GoCardless application;
- Create a GoCardless account or log in to your existing account; and
- Connect your account to be redirected to the Lago application.
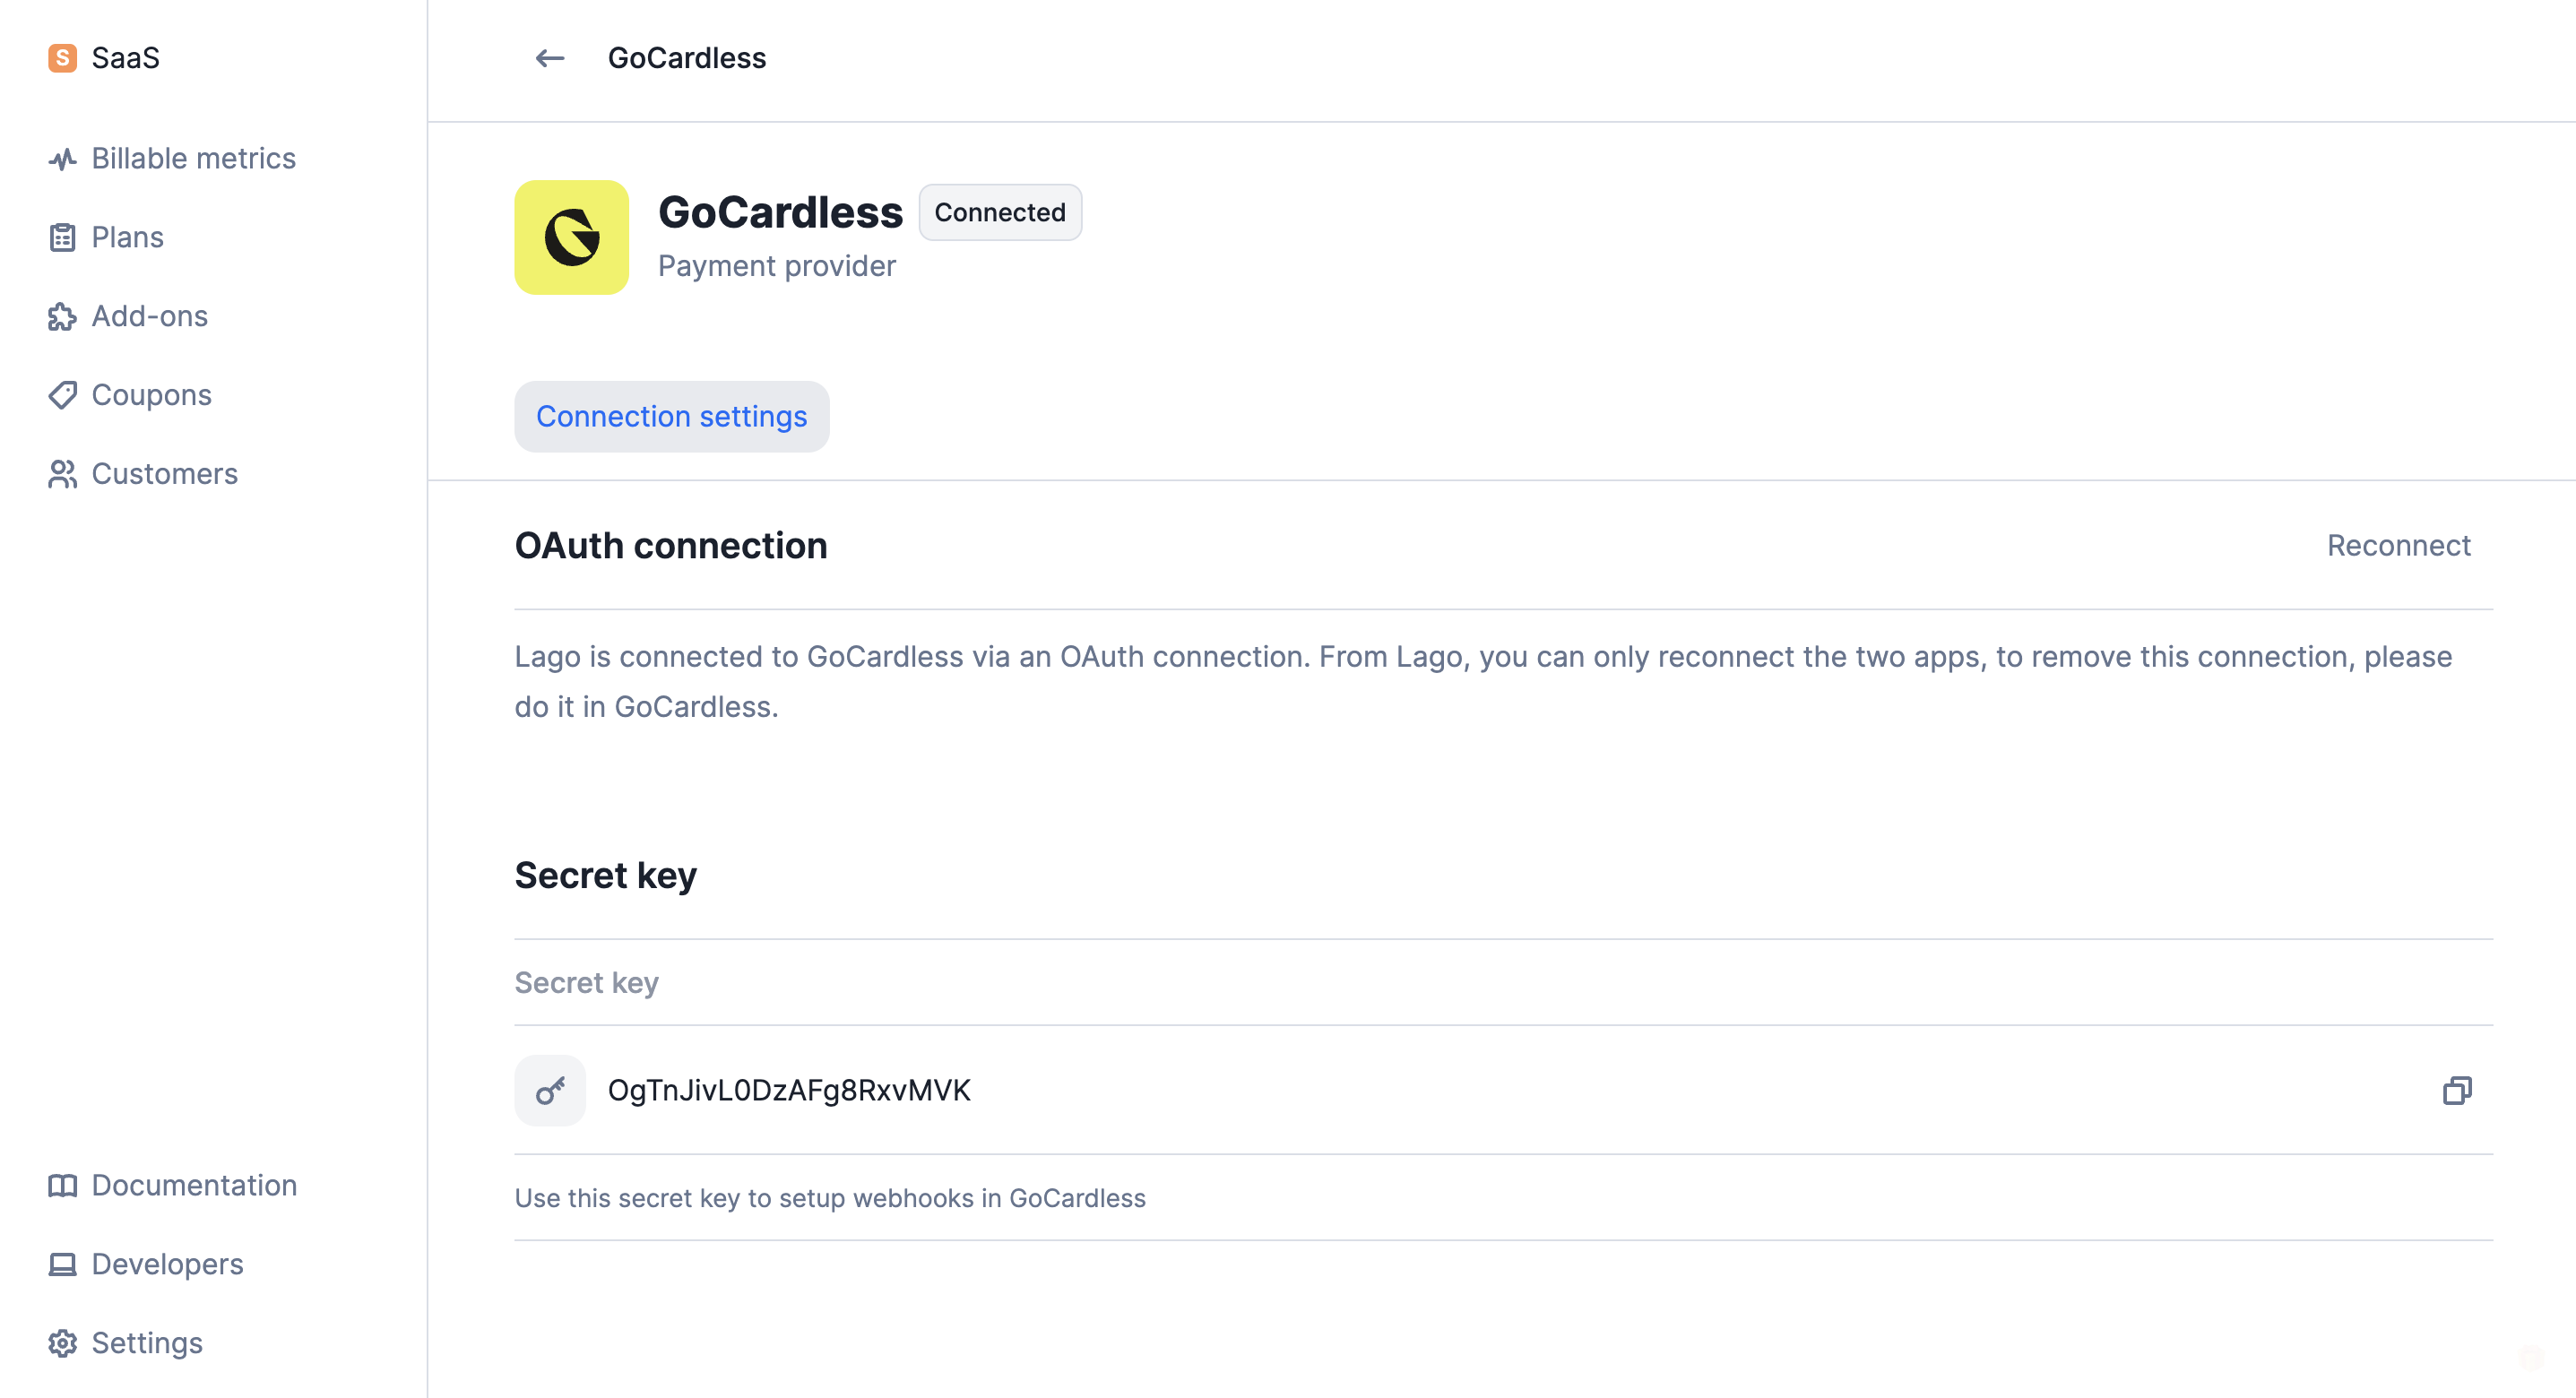
When the OAuth connection is active, you will see the screen below, with your
secret key.
Create webhook endpoints
To complete this process, you will need:
- Your Lago organization ID, available in the “API keys & ID” tab of the
“Developers” section; and
- Your secret key, available in the “Integrations” tab of the
“Settings” section (learn more).
- Log in to your GoCardless account;
- Go to the “Developers” section;
- In the upper right corner, click “Create” and then select “Webhook
endpoint”;
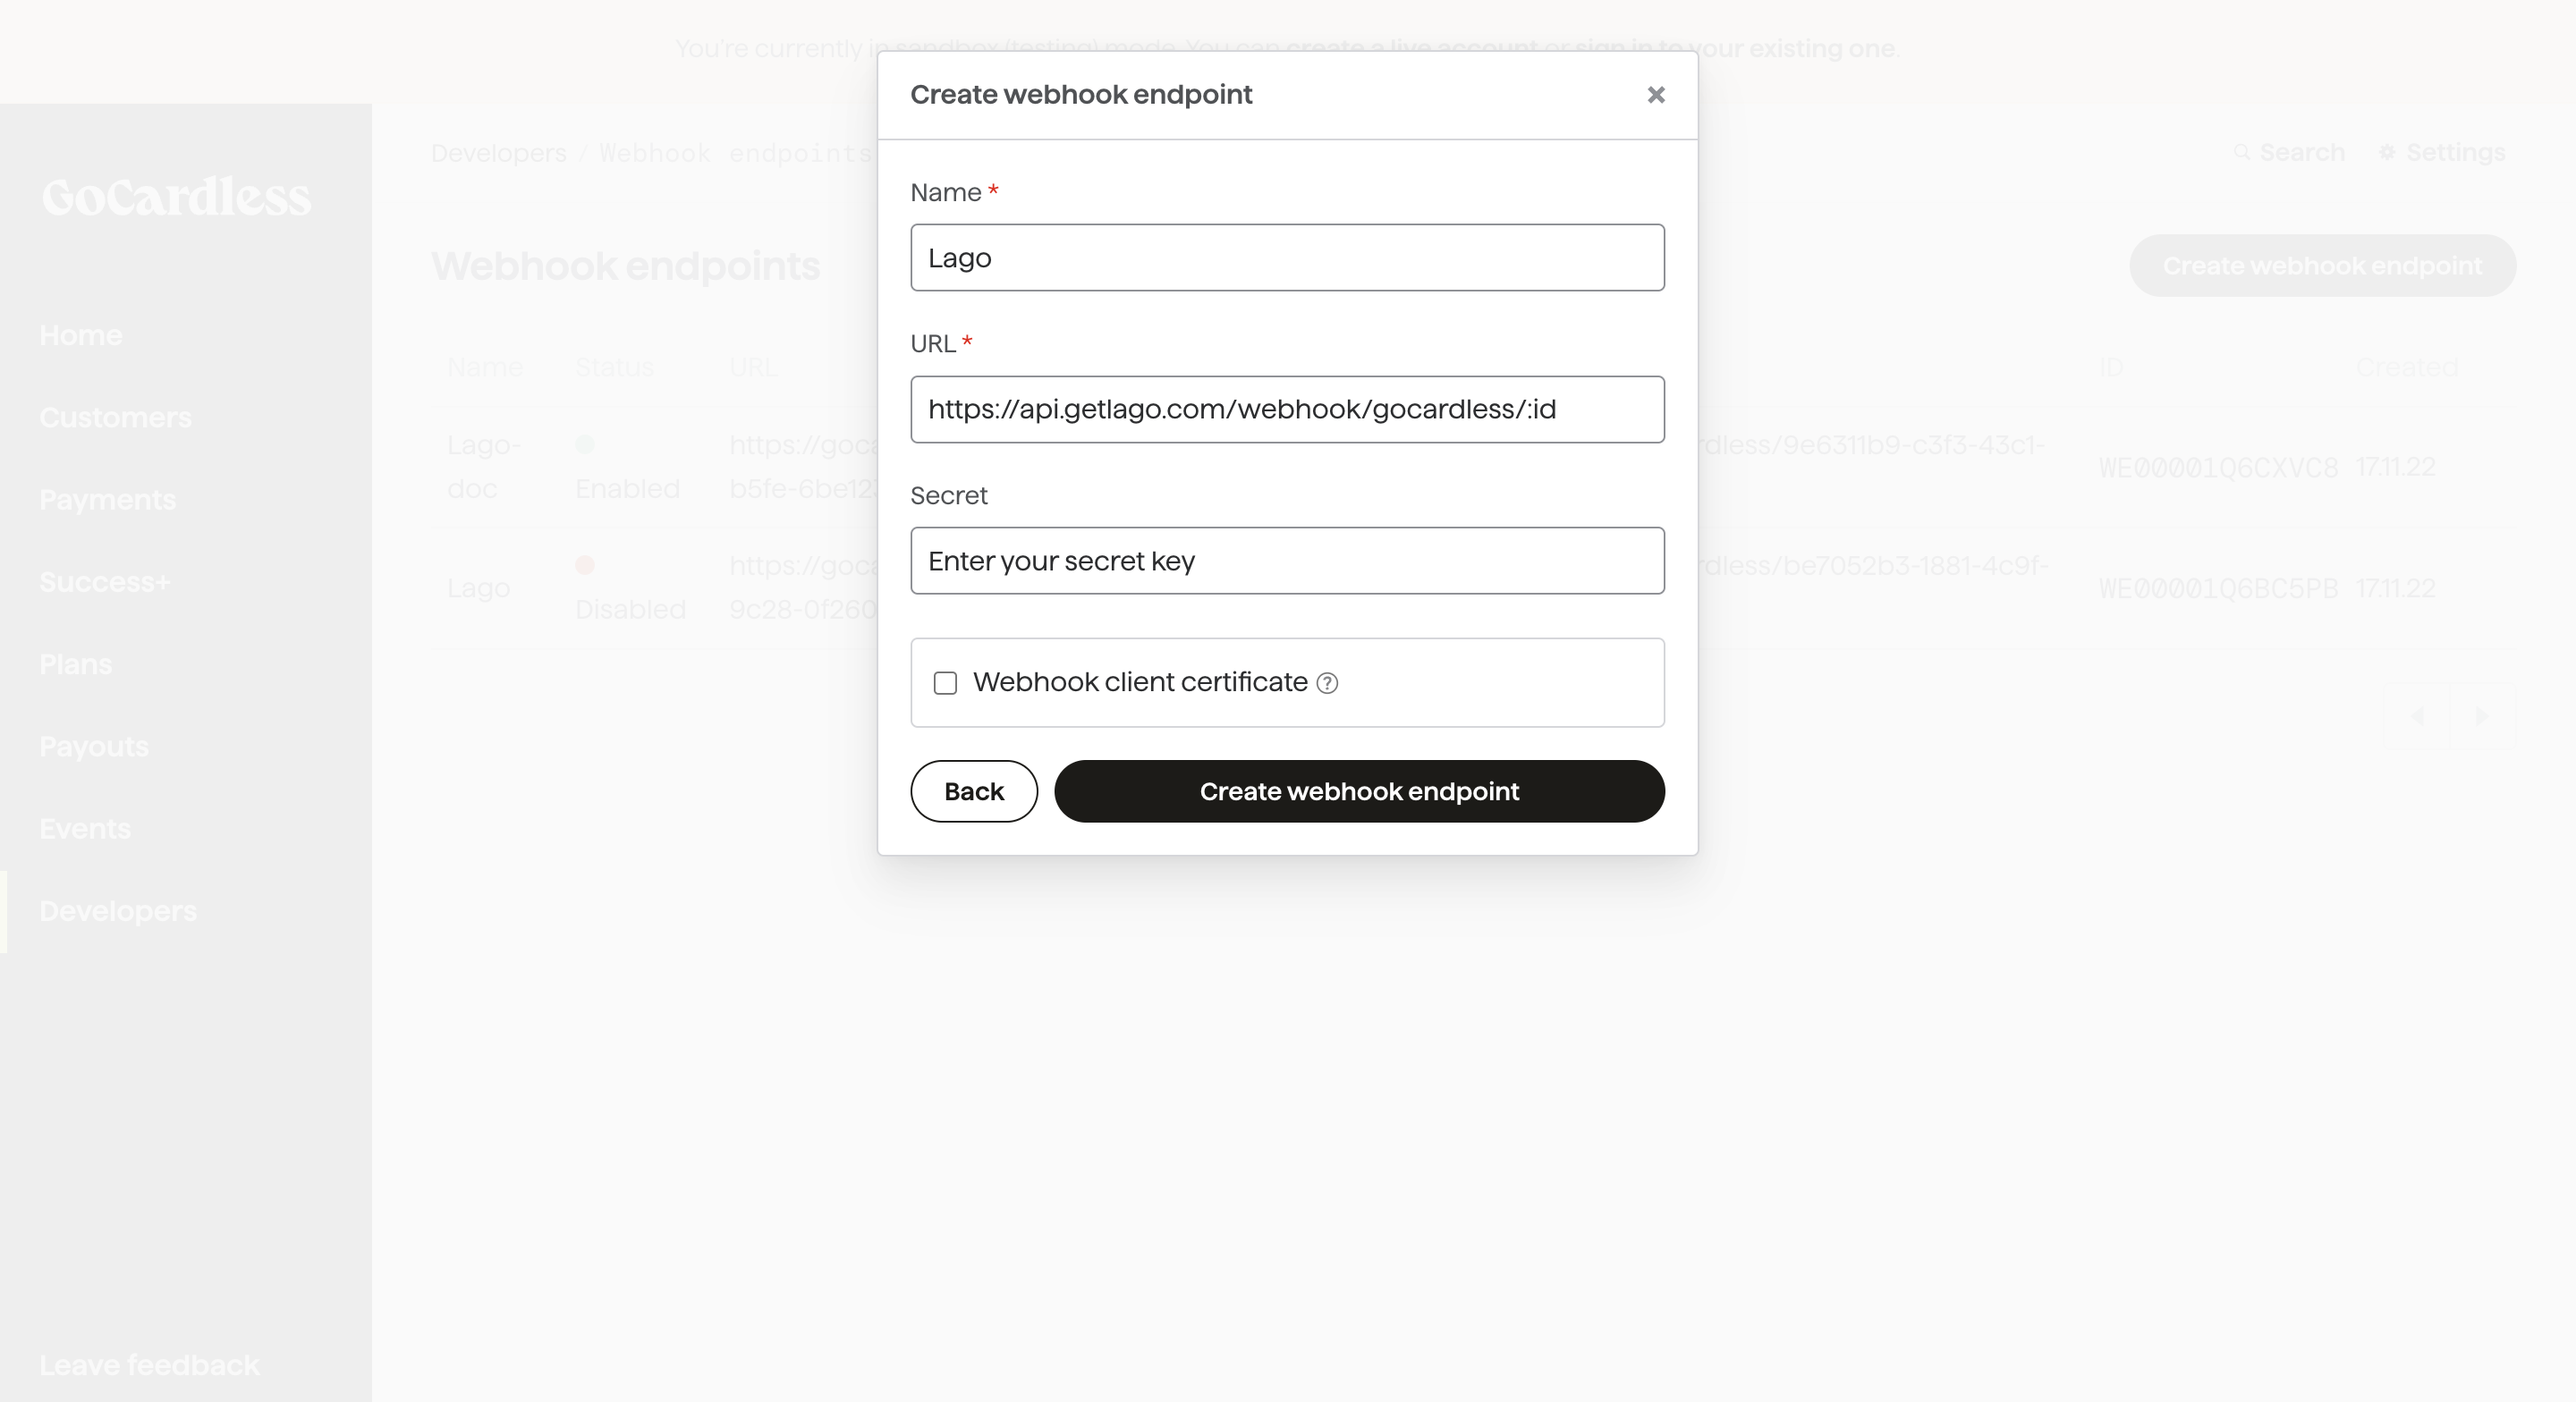
- Choose a name for this webhook (e.g. Lago);
- Enter the following URL:
https://api.getlago.com/webhooks/gocardless/{{organization_id}}?code={{connection_code}} (you must replace organization_id with your Lago organization ID, and the connection_code by the targeted Lago connection);
- Enter your secret key; and
- Click “Create webhook endpoint”.
In addition to this, you must create a webhook endpoint in Lago to retrieve the
checkout URL associated with each customer account
(learn more). To do so:
- Go to the “Developers” section of the Lago application;
- In the “Webhooks” tab, click “Add a webhook” on the right;
- Enter your webhook URL; and
- Click “Add webhook” to confirm.
For more information about our webhooks, please refer to the
API documentation.
Redirect url after checkout
After establishing the connection with GoCardless, set a success URL where your end customer will be directed after completing the checkout.
Please note that if it’s not defined, your end customer will be redirected to GoCardless’s website.
Please note that you can edit or delete the redirect URL, and this will only affect new checkout URLs created.
URL defined should always begin with http:// or https://.
New customer
If the customer does not already exist in GoCardless, you can first create them
in Lago, either via the user interface or
the API. When adding customer information, you
must:
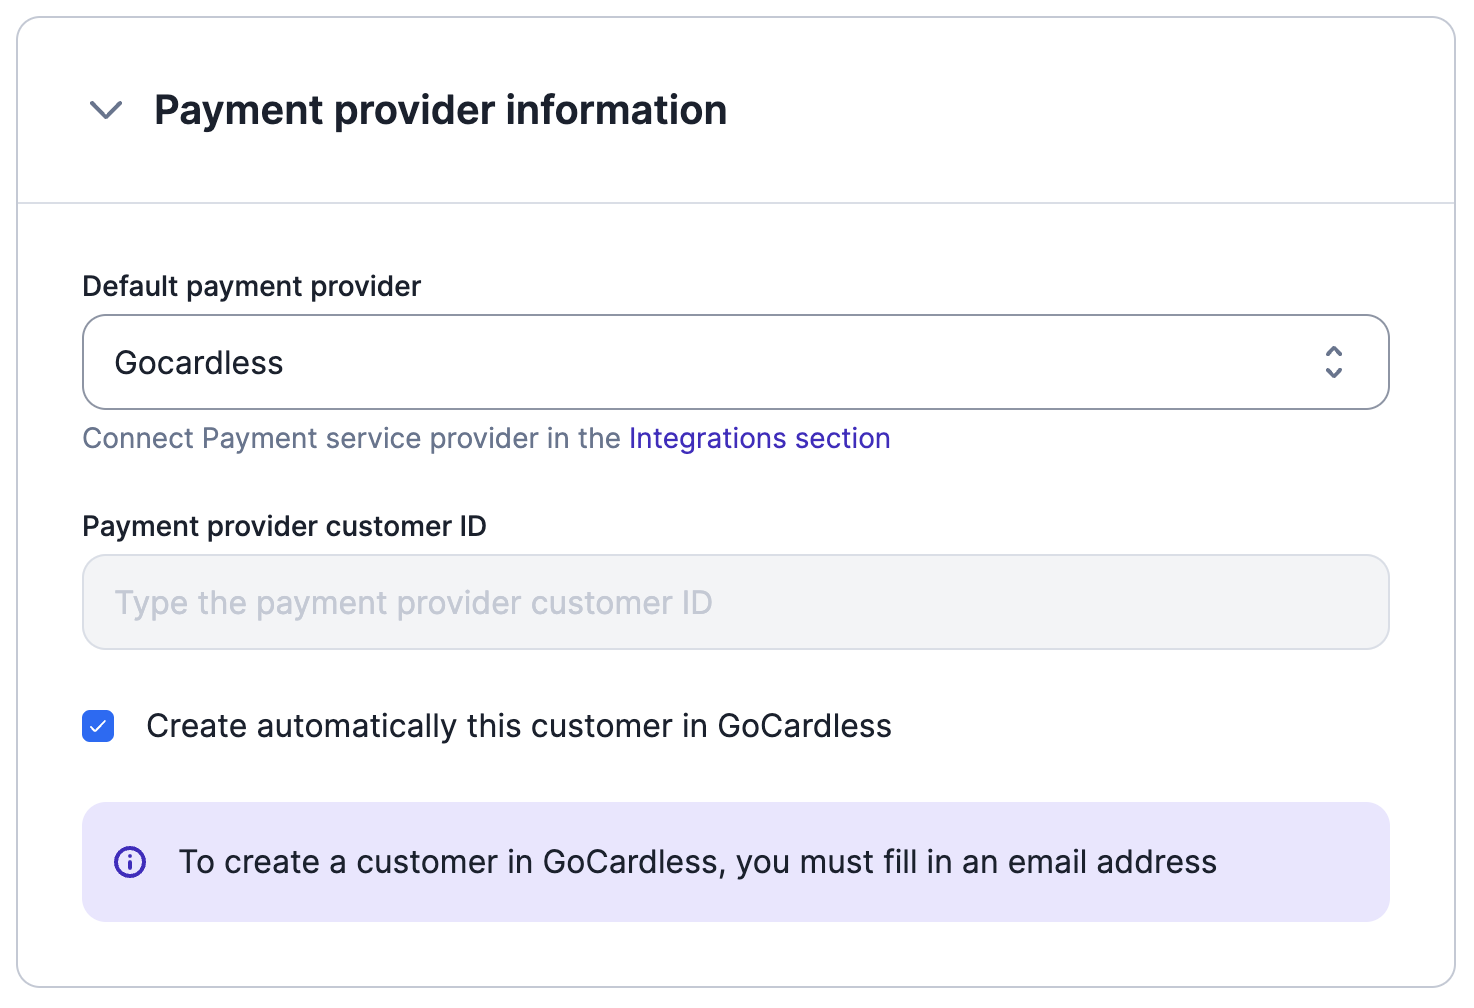
- Provide the customer’s email address;
- Define GoCardless as the default payment provider;
- Select the GoCardless connected account;
- Leave the field associated with the GoCardless customer ID blank; and
- Enable the option to automatically create the customer in GoCardless.
The customer will automatically be added to GoCardless. GoCardless will then
return the customer ID, which will be stored in Lago.
When the customer is successfully created, you will receive two
webhook messages:
customer.payment_provider_created that confirms the creation of the customer
in GoCardless; andcustomer.checkout_url_generated that includes the checkout URL to set up the
direct debit (learn more).
Existing customer
If the customer and direct debit mandate already exist in GoCardless, then you
should create the customer record in Lago, either via the user interface or
the API. When adding customer information, you
must:
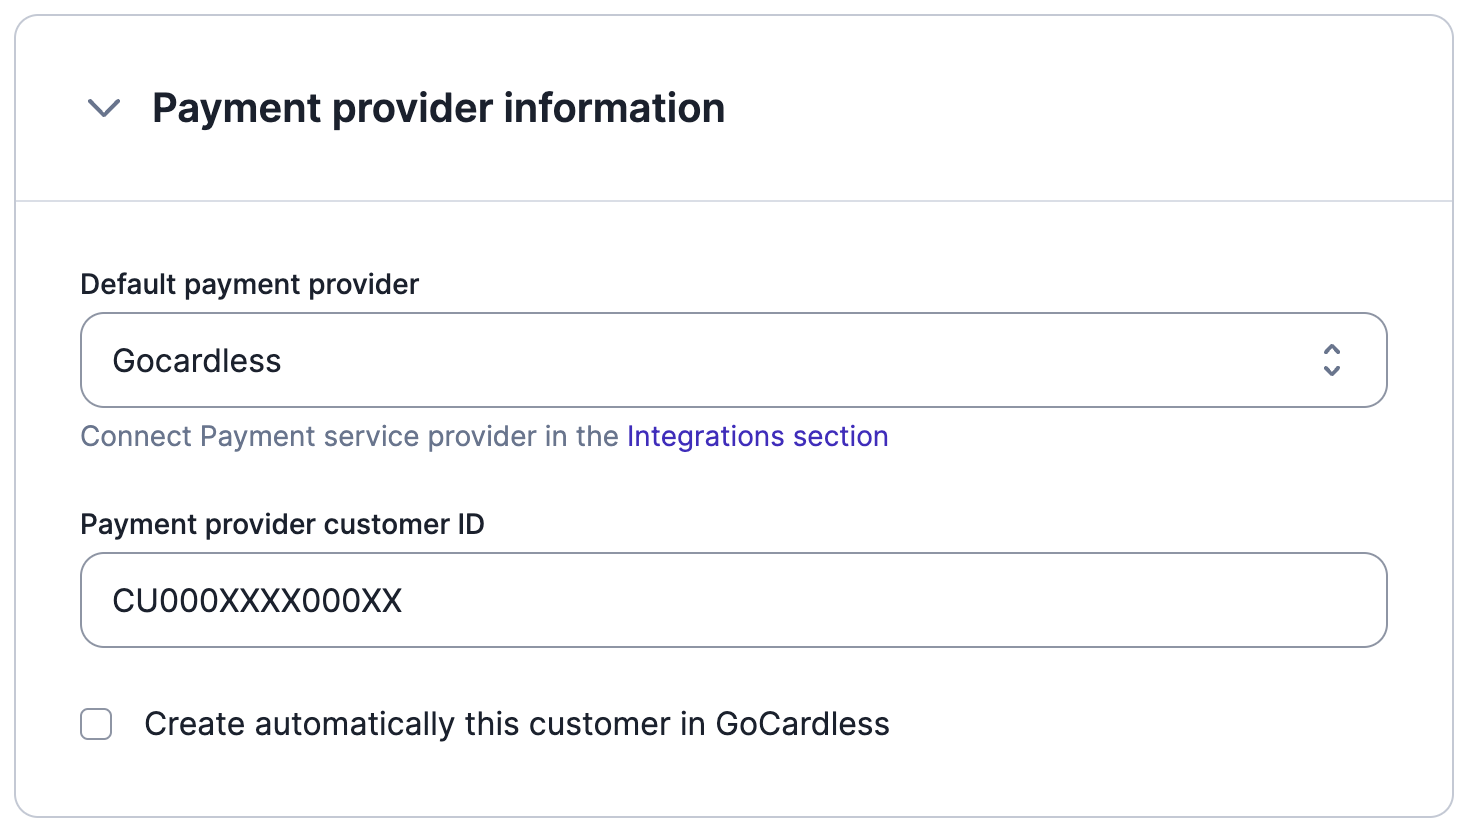
- Provide the customer’s email address;
- Define GoCardless as the default payment provider;
- Select the GoCardless connected account;
- Provide the GoCardless customer ID; and
- Disable the option to automatically create the customer in GoCardless.
Direct debit
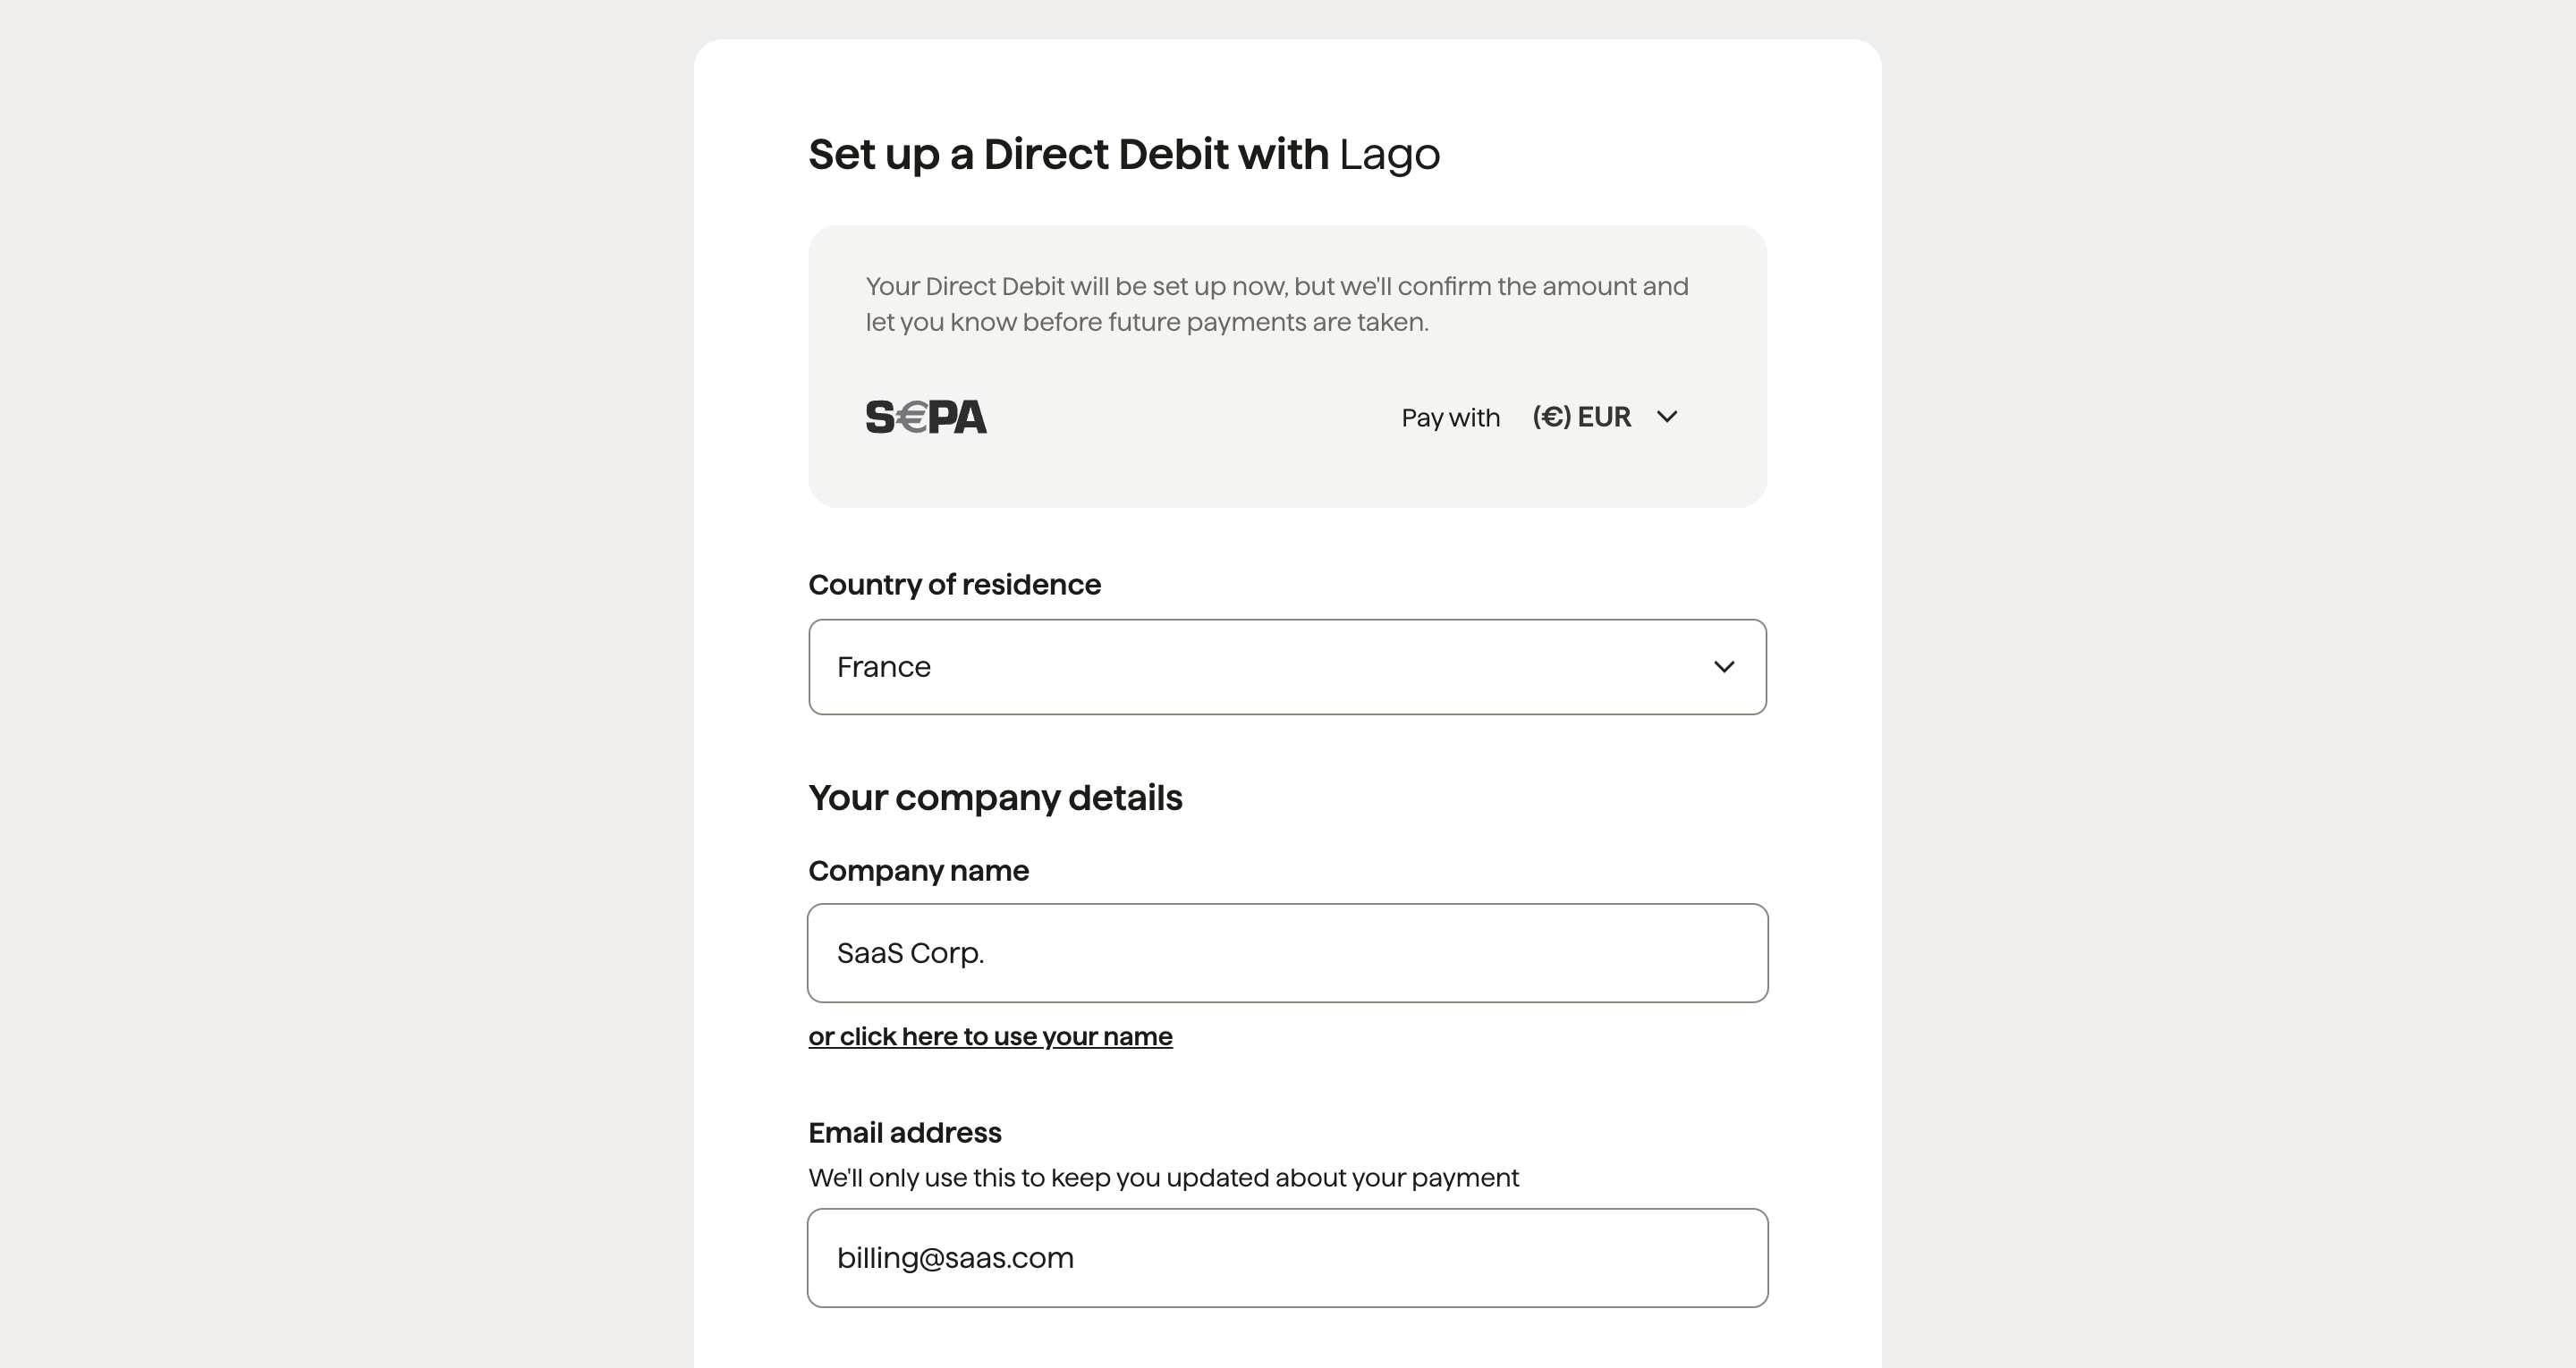
To collect payments via direct debit, a mandate must be created. To do so:
- Retrieve the checkout URL included in the
customer.checkout_url_generated
webhook; and
- Redirect your customer to the checkout page, so that they can complete the
online form and approve the mandate.
The mandate must be validated by GoCardless before the first payment can be
processed. It can take up to six business days to validate a new mandate. For
more information about payment timings, please consult the
GoCardless FAQ.
To collect payments via direct debit, the currency of the mandate must match
the currency of the plan associated with the customer’s subscription.
pending to succeeded.
If the payment fails, the status of the payment will switch from pending to
failed and Lago will generate an invoice.payment_failure
webhook.
If you have signed up for GoCardless
Success+, failed payments may
be automatically resubmitted, in which case Lago will automatically update the
invoice payment status. Regenerate checkout link on demand
In cases where your end customer has not had the opportunity to complete the checkout process to inform their payment method
or wishes to modify the saved payment information, you can generate a new checkout link using the designated endpoint.
POST /api/v1/customers/:customer_external_id/checkout_url
